Introduction To iVendNext POS Commands
POS Commands refer to specific instructions or operations that can be executed within the POS software to perform various tasks. These commands are typically configured and managed in the POS system's back office and can be assigned to buttons on the POS interface for easy access by users. These commands help streamline operations, improve efficiency, and enhance the overall customer experience at the point of sale. Some of the Key POS Commands are listed below:
1. Sales Transactions:
POS Commands to process sales, returns, and exchanges.
2. Inventory Management:
POS commands to check stock levels, update inventory, and manage stock transfers.
3. Customer Management:
POS commands to add new customers, look up customer information, and manage loyalty programs.
4. Payment Processing:
POS commands to accept various payment methods, process refunds, and handle split payments.
5. Reporting and Analytics:
POS commands to generate sales reports, inventory reports, and other analytics.
6. Employee Management:
POS commands to clock in/out, manage shifts, and track employee performance.
7. System Operations:
POS commands to open/close the register, perform end-of-day procedures, and manage system settings
POS Commands Table
The table below lists all the iVendNext POS Commands.
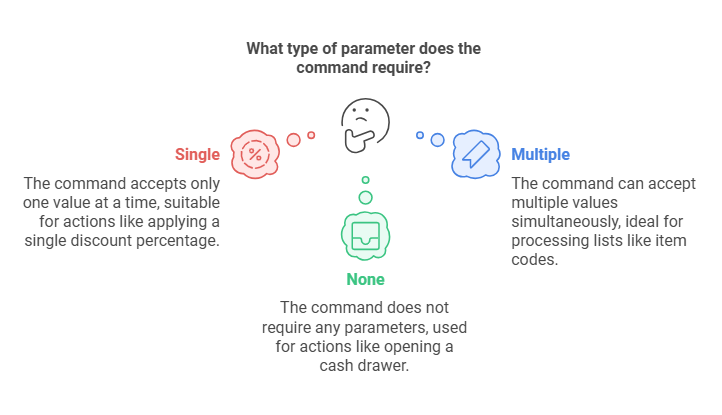
Before we cover the POS Commands and their parameters, let us recap the Parameter Types.
Single:
This means that the command parameter accepts only one value at a time. For example, a command to apply a discount might only accept a single discount percentage.
Multiple:
This allows the command parameter to accept more than one value simultaneously. For instance, a command to process multiple items in a transaction would accept a list of item codes.
None:
This indicates that the command does not require any parameters. An example could be a command to open the cash drawer, which doesn't need any additional information.
Please note that we have kept the Command ID’s and Command Names identical for ease of use. However, these can be different.
For each of the commands below we will cover the following:
Command ID
Command Name
Parameter Type
Command Function

1. Add Cross Selling Item
The table below explains the Add Cross Selling Item Command.
Command ID | Add Cross Selling Item |
Command Name | Add Cross Selling Item |
Parameter Type | None |
Parameter | Not Applicable |
Command Function | The command is used to suggest additional products to customers based on their current purchase. This strategy, known as cross-selling, aims to increase the overall sale by recommending complementary items. For example, if a customer is buying a laptop, the POS system might suggest adding a laptop bag or a mouse. This command helps retailers enhance the shopping experience by offering relevant products that customers might find useful, thereby potentially increasing revenue. |
2. Add Expense
The table below explains the Add Expense Command.
Command ID | Add Expense |
Command Name | Add Expense |
Parameter Type | None |
Parameter | Not Applicable |
Command Function | The command is used to record additional costs that are not directly related to sales transactions. This could include expenses like store supplies, maintenance costs, or any other operational expenses that need to be tracked separately from sales revenue. By using this command, businesses can keep a detailed record of their expenditures, which helps in maintaining accurate financial records and managing budgets more effectively. |
3. Add Gift Certificate Serial No
The table below explains the Add Gift Certificate Certificate Serial No Command.
Command ID | Add Gift Certificate Certificate Serial No |
Command Name | Add Gift Certificate Certificate Serial No |
Parameter Type | None |
Parameter | Not Applicable |
Command Function | The command is used to enter the unique serial number of a gift certificate when it is being issued or redeemed. This helps in tracking and managing gift certificates accurately. When issuing a gift certificate, the serial number is recorded to ensure it can be validated and tracked when the customer uses it for a purchase. This feature ensures that each gift certificate is unique and can be easily monitored, preventing fraud and ensuring smooth transactions. |
4. Add Negative POS Invoice Item
The table below explains the Add Negative POS Invoice Item Command.
Command ID | Add Negative POS Invoice Item |
Command Name | Add Negative POS Invoice Item |
Parameter Type | None |
Parameter | Not Applicable |
Command Function | The command is used to handle returns or refunds. When you add a negative item to an invoice, it effectively reduces the total amount of the invoice by the value of the returned or refunded item. By using this command, a retail business can ensure accurate financial records and provide a smooth return or refund process for customers. |
5. Add New Customer
The table below explains the Add New Customer Command.
Command ID | Add New Customer |
Command Name | Add New Customer |
Parameter Type | None |
Parameter | Not Applicable |
Command Function | The command allows store associates to create a new customer profile. This involves entering essential details such as the customer's name, email address, phone number, and address. By adding new customers to the system, businesses can enhance customer relationship management and provide a more tailored shopping experience. |
6. Add POS Invoice Customer
The table below explains the Add POS Invoice Customer Command.
Command ID | Add POS Invoice Customer |
Command Name | Add POS Invoice Customer |
Parameter Type | None |
Parameter | Not Applicable |
Command Function | The command is used to associate a specific customer with a sales invoice. This involves selecting an existing customer from the database or creating a new customer profile if they are not already in the system. By linking a customer to an invoice, businesses can keep detailed records of customer purchases, which is useful for tracking sales history, managing customer relationships, and offering personalized services. This feature is particularly helpful for businesses that want to provide tailored experiences or manage customer loyalty programs. |
7. Add POS Invoice Item
The table below explains the Add POS Invoice Item Command.
Command ID | Add POS Invoice Item |
Command Name | Add POS Invoice Item |
Parameter Type | None |
Parameter | Not Applicable |
Command Function | The command is used to add products or services to a sales invoice. When you use this command, you select items from the inventory to include in the customer's invoice, specifying quantities and prices. This is essential for creating accurate invoices that reflect the items being purchased by the customer. This feature helps ensure that all items are correctly accounted for in the transaction, making the billing process smooth and efficient. |
8. Add Product Bundle Item
The table below explains the Add Product Bundle Item Command.
Command ID | Add Product Bundle Item |
Command Name | Add Product Bundle Item |
Parameter Type | None |
Parameter | Not Applicable |
Command Function | The command is used to create and manage product bundles. A product bundle is a collection of individual items sold together as a single unit. For example, a "Dinner Set" might include plates, bowls, and cutlery. When you use this command, you select a parent item (the bundle) and add the component items that make up the bundle. This helps streamline the sales process by allowing the entire bundle to be added to a sales order with a single action. The system then handles the inventory and pricing for each component item within the bundle. This feature is particularly useful for promoting sales of related products and providing customers with a convenient package deal. |
9. Add Surcharges
The table below explains the Add Surcharges Command.
Command ID | Add Surcharges |
Command Name | Add Surcharges |
Parameter Type | None |
Parameter | Not Applicable |
Command Function | The command is used to apply additional fees to a customer's transaction. These surcharges can be for various reasons, such as covering credit card processing fees, service charges, or holiday surcharges. When you use this command, you can specify the type of surcharge, its value (either a fixed amount or a percentage), and whether it should be applied automatically to future transactions. This helps businesses manage extra costs efficiently and transparently. |
10. Add Total Surcharges
The table below explains the Add Total Surcharges Command.
Command ID | Add Total Surcharges |
Command Name | Add Total Surcharges |
Parameter Type | None |
Parameter | Not Applicable |
Command Function | The command is used to apply a cumulative surcharge to a transaction. This command aggregates all applicable surcharges, such as service fees, credit card processing fees, or holiday surcharges, and adds them to the total amount of the invoice. By using this command, businesses can ensure that all additional costs are transparently included in the final bill, making it easier to manage and track these extra charges. |
11. Alternate Products
The table below explains the Alternate Products Command.
Command ID | Alternate Products |
Command Name | Alternate Products |
Parameter Type | Single |
Parameter | Interface Profile ID To redirect |
Command Function | The command is used to suggest substitute products when the selected item is out of stock or unavailable. This feature helps ensure that customers can still find suitable alternatives, maintaining their satisfaction and potentially saving the sale. For example, if a customer wants to buy a specific brand of cereal that is out of stock, the POS system might suggest a similar brand or product that is available. This can be particularly useful in retail environments to keep the shopping experience smooth and efficient. |
12. Apply Coupon Code
The table below explains the Apply Coupon Code Command.
Command ID | Apply Coupon Code |
Command Name | Apply Coupon Code |
Parameter Type | None |
Parameter | Not Applicable |
Command Function | The command is used to apply discounts to a customer's transaction by entering a specific coupon code. When this command is used, the cashier or customer inputs the coupon code, and the system automatically applies the associated discount to the total purchase amount. This feature is particularly useful for promotions and marketing campaigns, allowing customers to benefit from special offers and discounts easily. |
13. AR Advance Payment
The table below explains the AR Advance Payment Command.
Command ID | AR Advance Payment |
Command Name | AR Advance Payment |
Parameter Type | None |
Parameter | Not Applicable |
Command Function | The command is used to record advance payments made by customers towards their accounts receivable (AR). This means that a customer pays in advance for goods or services that will be delivered or provided at a later date. When this command is used, the payment is recorded as a liability until the goods or services are delivered, at which point it is recognized as revenue. This helps businesses manage their cash flow and ensure that advance payments are properly tracked and applied to the correct customer accounts. |
14. Cash In
The table below explains the Cash In Command.
Command ID | Cash In |
Command Name | Cash In |
Parameter Type | None |
Parameter | Not Applicable |
Command Function | The command is used to record the addition of cash to the cash register. This could be for various reasons, such as starting the day with a float, adding change throughout the day, or recording cash received from non-sales activities. When you use this command, you typically enter the amount of cash being added and the reason for the addition. This helps maintain accurate cash management and ensures that the cash register balances correctly at the end of the day. |
15. Cash Out
The table below explains the Cash Out Command.
Command ID | Cash Out |
Command Name | Cash Out |
Parameter Type | None |
Parameter | Not Applicable |
Command Function | The command is used to record the removal of cash from the cash register. This could be for various reasons, such as depositing cash into the bank, paying for store expenses, or balancing the cash drawer at the end of a shift. When you use this command, you typically enter the amount of cash being removed and the reason for the removal. This helps maintain accurate cash management and ensures that the cash register balances correctly at the end of the day. |
16. Change Batch
The table below explains the Change Batch Command.
Command ID | Change Batch |
Command Name | Change Batch |
Parameter Type | None |
Parameter | Not Applicable |
Command Function | The command is used to manage and switch between different batches of transactions. Batching is the process of grouping multiple transactions together for processing and settlement. When you use the "Change Batch" command, you can close the current batch and start a new one. This is typically done at the end of a business day to ensure that all transactions are processed and settled correctly. It helps in organizing transactions, making it easier to track and reconcile sales, and ensuring accurate financial records. |
17. Change Serial No
The table below explains the Change Serial No Command.
Command ID | Change Serial No |
Command Name | Change Serial No |
Parameter Type | None |
Parameter | Not Applicable |
Command Function | The command is used to update or modify the serial number associated with a specific product. This is particularly useful for items that require serial number tracking for inventory management, warranty purposes, or regulatory compliance. When you use this command, you can correct errors in the recorded serial number or update it if the serial number has changed for any reason. This ensures that the inventory records remain accurate and that each item can be properly tracked throughout its lifecycle. |
18. Change UOM
The table below explains the Change UOM Command.
Command ID | Change UOM |
Command Name | Change UOM |
Parameter Type | None |
Parameter | Not Applicable |
Command Function | The command allows you to switch the unit of measure for a product during a transaction. This is particularly useful when selling items that can be measured in different units, such as weight, volume, or quantity. For example, you might sell flour by the kilogram or by the pound, depending on customer preference. Using this command ensures that the correct unit of measure is applied to the product, which helps in accurate pricing and inventory management. |
19. Clear Coupon Code
The table below explains the Clear Coupon Code Command.
Command ID | Clear Coupon Code |
Command Name | Clear Coupon Code |
Parameter Type | None |
Parameter | Not Applicable |
Command Function | The command is used to remove any coupon codes that have been applied to a transaction. When this command is executed, it deletes the discount associated with the coupon code, reverting the transaction total to its original amount before the coupon was applied. This feature is useful if a coupon was applied by mistake or if the customer decides not to use the coupon after all. |
20. Complete Transaction
The table below explains the Complete Transaction Command.
Command ID | Complete Transaction |
Command Name | Complete Transaction |
Parameter Type | Single |
Parameter | Parameter 1: Interface Profile ID To redirect after completion of transaction |
Command Function | The command finalizes the sales process. When this command is used, it processes the customer's payment, updates the inventory, and generates a receipt. This step ensures that the transaction is recorded accurately in the system, marking the end of the sales interaction. |
Here's a brief overview of what happens when you complete a transaction:
Payment Processing:
The system processes the payment using the chosen method (cash, credit card, mobile payment, etc.)
Inventory Update:
The inventory levels are adjusted to reflect the items sold.
Receipt Generation:
A receipt is created and can be printed or sent electronically to the customer.
This command is essential for maintaining accurate sales records and ensuring a smooth checkout experience.
21. Customer Edit
The table below explains the Customer Edit Command.
Command ID | Customer Edit |
Command Name | Customer Edit |
Parameter Type | None |
Parameter | Not Applicable |
Command Function | The command allows store associates to update or modify existing customer information. This includes details such as the customer's name, email address, phone number, and address. Using this command, staff can ensure that customer records are accurate and up-to-date, which is essential for effective customer relationship management, marketing, and personalized service. This feature is particularly useful for maintaining the quality of customer data and enhancing the overall shopping experience. |
22. Customer View
The table below explains the Customer View Command.
Command ID | Customer View |
Command Name | Customer View |
Parameter Type | None |
Parameter | Not Applicable |
Command Function | The command allows store associates to access and view detailed information about a customer. This includes their purchase history, contact details, loyalty points, and any other relevant data stored in the system. Using this command, staff can provide personalized service, address customer inquiries more effectively, and manage customer relationships better. This feature is particularly useful for enhancing the shopping experience by allowing associates to quickly retrieve and review customer information. |
23. Delete Suspended Transaction
The table below explains the Delete Suspended Transaction Command.
Command ID | Delete Suspended Transaction |
Command Name | Delete Suspended Transaction |
Parameter Type | None |
Parameter | Not Applicable |
Command Function | The command is used to remove transactions that have been temporarily suspended. Suspended transactions are those that have been paused and saved for later completion, often to free up the register for other tasks. When you use this command, it permanently deletes the selected suspended transaction from the system, ensuring it no longer appears in the list of pending transactions. This can be useful for clearing out old or unnecessary suspended transactions, helping to keep the system organized and efficient. |
24. Edit Fulfillment Items
The table below explains the Edit Fulfillment Items Command.
Command ID | Edit Fulfillment Items |
Command Name | Edit Fulfillment Items |
Parameter Type | None |
Parameter | Not Applicable |
Command Function | The command allows users to modify the details of items that are part of a customer order, particularly those that are being fulfilled. This can include changing quantities, updating item descriptions, or adjusting other relevant details. This command is useful for managing customer orders that may need adjustments before they are fully processed or shipped. It ensures that the order details are accurate and up-to-date, which is crucial for maintaining customer satisfaction and efficient order management. |
25. Edit POS Closing Amount
The table below explains the Edit POS Closing Amount Command.
Command ID | Edit POS Closing Amount |
Command Name | Edit POS Closing Amount |
Parameter Type | None |
Parameter | Not Applicable |
Command Function | The command allows users to adjust the final cash amount recorded at the end of a shift or business day. This is crucial for ensuring that the cash register balances accurately with the actual cash on hand. When you use this command, you can correct any discrepancies between the expected and actual cash amounts, which helps in maintaining precise financial records and identifying any errors or issues in cash handling. |
26. End Manager Override
The table below explains the End Manager Override Command.
Command ID | End Manager Override |
Command Name | End Manager Override |
Parameter Type | None |
Parameter | Not Applicable |
Command Function | The command is used to conclude a manager override session. Manager overrides are typically initiated when a cashier or employee needs authorization to perform restricted actions, such as processing large returns, applying special discounts, or voiding transactions. When the "End Manager Override" command is executed, it signifies that the manager's intervention is complete, and control is returned to the cashier or employee. This helps maintain security and ensures that restricted actions are properly authorized and documented. |
27. Exit POS
The table below explains the Exit POS Command.
Command ID | Exit POS |
Command Name | Exit POS |
Parameter Type | None |
Parameter | Not Applicable |
Command Function | The command is used to close the POS application. This action effectively ends the current session without changing the date displayed on the POS screen. It's typically used when you need to temporarily shut down the POS system, such as for a break or maintenance, and plan to reopen it later the same day. This command helps ensure that the POS system can be paused and resumed without disrupting the overall daily operations. |
28. Fulfillment Setup
The table below explains the Fulfillment Setup Command.
Command ID | Fulfillment Setup |
Command Name | Fulfillment Setup |
Parameter Type | None |
Parameter | Not Applicable |
Command Function | The command is used to configure and manage the order fulfillment process within the store. This involves setting up parameters and options for how orders will be processed, whether they are for shipping, in-store pickup, or other fulfillment methods. |
Here's what you can typically do with the "Fulfillment Setup" command:
Define Fulfillment Parameters:
Specify how orders should be handled, including shipping and pickup options.
Assign Fulfillment Groups:
Link specific fulfillment groups to stores to manage where and how orders are processed.
Configure Permissions:
Set permissions for who can access and manage order fulfillment tasks.
This setup ensures that the store can efficiently manage customer orders, improving the overall shopping experience by providing clear and organized fulfillment processes.
29. Line Discount Amount
The table below explains the Line Discount Amount Command.
Command ID | Line Discount Amount |
Command Name | Line Discount Amount |
Parameter Type | None |
Parameter | Not Applicable |
Command Function | The command allows users to apply a specific discount amount to an individual item in a transaction. When you use this command, you select the item line and enter the discount amount you want to apply. The system then adjusts the price of that item accordingly. This feature is useful for providing targeted discounts on specific products, ensuring flexibility in pricing and promotions. |
30. Line Discount Percent
The table below explains the Line Discount Percent Command.
Command ID | Line Discount Percent |
Command Name | Line Discount Percent |
Parameter Type | None |
Parameter | Not Applicable |
Command Function | The command allows users to apply a percentage discount to a specific item in a transaction. When you use this command, you select the item and enter the discount percentage you want to apply. The system then adjusts the price of that item based on the entered percentage. This feature is useful for providing flexible discounts on individual products, ensuring that customers receive the correct price adjustments during promotions or special offers. |
31. Logout
The table below explains the Logout Command.
Command ID | Logout |
Command Name | Logout |
Parameter Type | None |
Parameter | Not Applicable |
Command Function | The command is used to log the current user out of the system. This action ends the current session and returns the POS to the login screen, allowing a different user to log in. This feature is essential for maintaining security and ensuring that only authorized personnel have access to the POS system. It can also be configured to automatically log out users after a period of inactivity or after each transaction to enhance security. |
32. New Invoice
The table below explains the New Invoice Command.
Command ID | New Invoice |
Command Name | New Invoice |
Parameter Type | None |
Parameter | Not Applicable |
Command Function | The command is used to create a new sales invoice for a customer. This process involves selecting the customer, adding the items they are purchasing, and specifying the quantities and prices. Once the invoice is created, it can be processed for payment, and a receipt can be generated. This command is essential for documenting sales transactions, ensuring accurate billing, and maintaining financial records. |
33. Open Button Panel
The table below explains the Open Button Panel Command.
Command ID | Open Button Panel |
Command Name | Open Button Panel |
Parameter Type | Single |
Parameter | Parameter 1 - Button Panel ID |
Command Function | The command typically brings up a customizable panel of buttons which can be further programmed for various functions, such as applying discounts, processing specific types of transactions, or accessing frequently used features quickly. This helps streamline operations and improve efficiency at the point of sale. |
34. Open ERP Form View
The table below explains the Open ERP Form View Command.
Command ID | Open ERP Form View |
Command Name | Open ERP Form View |
Parameter Type | None |
Parameter | Not Applicable |
Command Function | The command allows users to open ERP Form View. |
35. Pay By Bank Cheque
The table below explains the Pay By Cheque Command.
Command ID | Pay By Bank Cheque |
Command Name | Pay By Bank Cheque |
Parameter Type | None |
Parameter | Not Applicable |
Command Function | The command allows customers to pay for their purchases using a bank cheque. |
Here are the key functions:
Cheque Verification:
The POS system may verify the cheque details to ensure it is valid and authorized.
Transaction Recording:
Records the payment in the system, ensuring accurate financial tracking.
Customer Convenience:
Provides an alternative payment method for customers who prefer using cheques.
This command helps accommodate different payment preferences, enhancing the overall customer experience.
36. Pay By Cash
The table below explains the Pay By Cash Command.
Command ID | Pay By Cash |
Command Name | Pay By Cash |
Parameter Type | None |
Parameter | Not Applicable |
Command Function | The 'Pay By Cash' command at a Point of Sale (POS) allows customers to complete their purchase using cash. |
Some of the key functions are listed below:
Cash Entry:
The cashier enters the amount of cash received from the customer into the POS.
Change Calculation:
The system automatically calculates any change due to the customer.
Cash Drawer Operation:
The cash drawer opens to allow the cashier to place the received cash and retrieve any change.
Transaction Recording:
The POS system records the transaction, ensuring accurate financial tracking.
This command helps streamline the checkout process, making it quick and efficient for both customers and cashiers.
37. Pay By Credit Card
The table below explains the Pay By Credit Card Command.
Command ID | Pay By Credit Card |
Command Name | Pay By Credit Card |
Parameter Type | None |
Parameter | Not Applicable |
Command Function | The command allows customers to make payments using their credit cards. |
Some of the key functions are listed below:
Card Data Capture:
The customer swipes, inserts, or taps their credit card on the POS terminal.
Authorization Request:
The POS system sends a request to the customer's bank for authorization.
Transaction Approval:
Once authorized, the payment amount is approved and deducted from the customer's credit limit.
Transaction Recording:
The POS system records the transaction, ensuring accurate financial tracking.
This command helps streamline the payment process, making it quick and convenient for both customers and merchants.
38. Pay By Custom
The table below explains the Pay By Custom Command.
Command ID | Pay By Custom |
Command Name | Pay By Custom |
Parameter Type | None |
Parameter | Not Applicable |
Command Function | The 'Pay By Custom' command at a Point of Sale (POS) allows for flexible payment options that are not covered by standard payment methods like cash, credit, or debit cards. This command can be configured to handle various unique or specialized payment types based on your retail business needs. |
Some of the key uses are listed below:
Custom Payment Methods:
Accept payments through non-traditional methods such as loyalty points, store credits, or third-party payment systems.
Special Promotions:
Handle payments related to specific promotional campaigns or discounts.
Business-Specific Payments:
Accommodate unique payment arrangements that are specific to the business, such as barter transactions or employee purchases.
This command provides the flexibility to tailor the POS to meet specific business requirements and customer preferences.
39. Pay By Debit Card
The table below explains the Open ERP Form View Command.
Command ID | Pay By Debit Card |
Command Name | Pay By Debit Card |
Parameter Type | None |
Parameter | Not Applicable |
Command Function | The command allows customers to make payments using their debit cards. |
Some of the Key functions are listed below:
Card Data Capture:
The customer swipes, inserts, or taps their debit card on the POS terminal.
Authorization Request:
The POS system sends a request to the customer's bank for authorization.
Immediate Deduction:
Once authorized, the payment amount is immediately deducted from the customer's bank account.
Transaction Recording:
The POS system records the transaction, ensuring accurate financial tracking.
This command helps streamline the payment process, making it quick and convenient for both customers and merchants.
40. Pay by Elavon
The table below explains the Pay By Elavon Command.
Command ID | Pay By Elavon |
Command Name | Pay By Elavon |
Parameter Type | None |
Parameter | Not Applicable |
Command Function | The command is used to process payments through Elavon, a well-known payment processing provider. |
This command allows the POS system to handle various types of transactions, including:
Credit and Debit Card Payments:
Accept payments from major credit and debit cards.
Contactless Payments:
Process payments made via contactless methods, such as tap-to-pay with cards or mobile wallets.
E-commerce Transactions:
Handle online payments if integrated with an e-commerce platform.
Secure Transactions:
Ensure that all transactions are processed securely, complying with industry standards.
This command helps streamline the payment process, making it convenient and efficient for both customers and merchants.
41. Pay by Moneris
The table below explains the Pay By Moneris Command.
Command ID | Pay By Moneris |
Command Name | Pay By Moneris |
Parameter Type | None |
Parameter | Not Applicable |
Command Function | The command is used to process payments through Moneris, a popular payment processing solution. |
This command allows the POS system to handle various types of transactions, including:
Credit and Debit Card Payments:
Accept payments from major credit and debit cards.
Contactless Payments:
Process payments made via contactless methods, such as tap-to-pay with cards or mobile wallets.
E-commerce Transactions:
Handle online payments if integrated with an e-commerce platform.
Secure Transactions:
Ensure that all transactions are processed securely, complying with industry standards.
This command helps streamline the payment process, making it convenient and efficient for both customers and merchants.
42. Pay By Gift Certificate
The table below explains the Pay By Gift Certificate Command.
Command ID | Pay By Gift Certificate |
Command Name | Pay By Gift Certificate |
Parameter Type | None |
Parameter | Not Applicable |
Command Function | The command allows customers to use gift certificates as a form of payment for their purchases. |
Some of the key functions are listed below:
Redeeming Gift Certificates:
Customers can apply the value of the gift certificate towards their purchase.
Balance Management:
The system tracks the remaining balance on the gift certificate if it is not fully used in one transaction.
Transaction Recording:
The POS system records the use of the gift certificate, ensuring accurate financial and inventory records.
Customer Convenience:
Provides an alternative payment method, enhancing the shopping experience.
This command helps streamline the checkout process and offers flexibility in payment options.
43. Pay By On-Account
The table below explains the Pay By On-Account Command.
Command ID | Pay By On-Account |
Command Name | Pay By On-Account |
Parameter Type | None |
Parameter | Not Applicable |
Command Function | The command allows customers to charge their purchase to an account they have with the store, rather than paying immediately with cash, card, or other payment methods. This command is particularly useful for businesses that offer credit terms to their customers. |
Here are the key functions:
Deferred Payment:
Customers can make purchases and pay for them at a later date, based on the agreed credit terms.
Account Management:
The POS tracks the outstanding balance on the customer's account, ensuring accurate record-keeping.
Billing:
Periodic statements can be generated to inform customers of their account balance and due dates for payment.
Customer Convenience:
Enhances customer satisfaction by providing flexible payment options.
This command is especially useful for businesses dealing with regular customers or B2B transactions where credit terms are common.
44. Pay By Voucher
The table below explains the Pay By Voucher Command.
Command ID | Pay By Voucher |
Command Name | Pay By Voucher |
Parameter Type | None |
Parameter | Not Applicable |
Command Function | The command allows customers to use vouchers as a form of payment for their purchases. Vouchers can be issued for various reasons, such as promotional offers, refunds, or gift certificates. |
Some of the key functions are listed below:
Voucher Redemption:
Customers can apply the value of the voucher towards their purchase.
Balance Management:
The system tracks the remaining balance on the voucher if it is not fully used in one transaction.
Transaction Recording:
The POS system records the use of the voucher, ensuring accurate financial and inventory records.
Customer Convenience:
Provides an alternative payment method, enhancing the shopping experience.
This command helps streamline the checkout process and offers flexibility in payment options.
45. Pay Fixed Currency Amount
The table below explains the Pay By Fixed Currency Command.
Command ID | Pay Fixed Currency Amount |
Command Name | Pay Fixed Currency Amount |
Parameter Type | None |
Parameter | Not Applicable |
Command Function | The 'Pay Fixed Currency Amount' command at a Point of Sale (POS) allows you to quickly process payments of predefined fixed amounts. This is particularly useful for handling common payment scenarios where customers pay with specific denominations. For Example: ( \$10, \$20, \$50). |
46. POS Closing Entry
The table below explains the POS Closing Entry Command.
Command ID | POS Closing Entry |
Command Name | POS Closing Entry |
Parameter Type | None |
Parameter | Not Applicable |
Command Function | The command is used to finalize the day's transactions and prepare the system for the next business day. |
This command typically performs the following key actions:
End-of-Day Processing:
It closes out all sales for the day, ensuring that all transactions are recorded and accounted for.
Cash Drawer Reconciliation:
It helps in balancing the cash drawer by comparing the cash on hand with the sales recorded in the system.
Generating Reports:
It often triggers the generation of end-of-day reports, such as sales summaries, inventory updates, and financial reports.
Resetting the System:
It resets the POS system for the next day, which may include clearing temporary data and preparing the system for new transactions.
This command is crucial for maintaining accurate financial records and ensuring smooth operations in retail environments.
47. Price Override
The table below explains the Price Override Command.
Command ID | Price Override |
Command Name | Price Override |
Parameter Type | None |
Parameter | Not Applicable |
Command Function | The command allows authorized users to change the price of an item during a transaction. This can be useful in various scenarios, such as applying special discounts, correcting pricing errors, or accommodating customer-specific pricing agreements. |
Some of the key functions are listed below:
Adjusting Prices:
Change the price of an item to a new value, either higher or lower than the original price.
Applying Discounts:
Enter a specific discount amount or percentage to adjust the item's price.
Manager Authorization:
Often requires manager approval to ensure that price changes are controlled and authorized.
Transaction Flexibility:
Provides flexibility in handling unique pricing situations without needing to update the main pricing database.
This command helps ensure that pricing can be adjusted as needed to meet customer expectations and business requirements.
48. Print Gift Receipt
The table below explains the Print Gift Receipt Command.
Command ID | Print Gift Receipt |
Command Name | Print Gift Receipt |
Parameter Type | None |
Parameter | Not Applicable |
Command Function | The command generates a receipt that excludes pricing and payment information, making it suitable for gift-giving. |
Some of the key functions are listed below:
Excludes Sensitive Information:
Omits item prices and payment details, showing only the items purchased.
Facilitates Returns:
Allows the recipient to return or exchange items without revealing the purchase price.
Customer Convenience:
Provides a neat and professional receipt for gift items
This command enhances the gifting experience by ensuring that the recipient has all the necessary information for returns or exchanges without seeing the cost.
49. Print Receipt
The table below explains the Print Receipt Command.
Command ID | Print Receipt |
Command Name | Print Receipt |
Parameter Type | None |
Parameter | Not Applicable |
Command Function | The command generates a physical copy of the transaction details for the customer. |
This receipt includes important information such as:
Transaction Summary:
Details of the items purchased, quantities, and prices.
Total Amount:
The total cost of the transaction, including taxes and any discounts applied.
Payment Method:
Information on how the payment was made (e.g., cash, credit card).
Date and Time:
The exact date and time of the transaction.
Store Information:
Details about the store, such as the name, address, and contact information.
This command ensures that customers receive a record of their purchase, which can be useful for returns, exchanges, or personal record-keeping.
50. Print Suspended Transaction
The table below explains the Print Suspended Transaction Command.
Command ID | Print Suspended Transaction |
Command Name | Print Suspended Transaction |
Parameter Type | None |
Parameter | Not Applicable |
Command Function | The 'Print Suspended Transaction' command at a Point of Sale (POS) generates a printed receipt for a transaction that has been temporarily suspended. This receipt typically includes details such as the transaction ID, items in the transaction, and any other relevant information. |
Some of the key functions are listed below:
Transaction Identification:
Provides a unique ID for the suspended transaction, making it easy to recall later.
Customer Reference:
Gives the customer a physical copy of the transaction details, which can be useful if they need to return to complete the purchase.
Operational Efficiency:
Allows store associates to quickly free up the register for other tasks without losing the progress on the current transaction.
This command is particularly useful in busy retail environments where transactions may need to be paused and resumed later.
51. Print X Report
The table below explains the Print X Report Command.
Command ID | Print X Report |
Command Name | Print X Report |
Parameter Type | None |
Parameter | Not Applicable |
Command Function | The command generates a detailed report of the transactions up to that point in time. |
This detailed report can be used for the following purposes:
Sales Monitoring:
Provides an up-to-the-minute summary of sales, helping managers and staff keep track of daily performance.
Cash Reconciliation:
Assists in balancing the cash drawer by showing the total sales and cash collected.
Shift Management:
Useful for shift changes, allowing the incoming staff to see the sales activity of the previous shift.
Inventory Management:
Helps in tracking the items sold, which can be useful for inventory control.
Unlike the Z report, the X report does not close the current batch of transactions, making it ideal for periodic checks throughout the day.
52. Quick Cash
The table below explains the Quick Cash Command.
Command ID | Quick Cash |
Command Name | Quick Cash |
Parameter Type | None |
Parameter | Not Applicable |
Command Function | The command is designed to speed up the checkout process by allowing cash payments to be processed quickly. |
Some of the prominent features of the command are listed below:
Preset Denominations:
The system displays a list of predefined cash denominations (e.g., \$10, \$20, \$50) that the customer might use to pay.
Fast Payment Processing:
The cashier selects the denomination that matches the cash provided by the customer.
Automatic Calculation:
The system automatically calculates and displays the change due, if any.
Receipt Printing:
A receipt is generated, showing the payment details and any change given.
This command helps streamline transactions, reducing wait times and improving the overall efficiency of the checkout process.
53. Record as Lost Sales
The table below explains the Record as Lost Sales Command.
Command ID | Record As Lost Sales |
Command Name | Record As Lost Sales |
Parameter Type | None |
Parameter | Not Applicable |
Command Function | The command is used to track and document instances where a sale could not be completed due to stockouts or other issues. This command helps businesses understand and quantify potential revenue losses. This command is crucial for optimizing inventory levels and ensuring that popular items are adequately stocked to meet customer demand. |
54. Redirect To Interface Profile
The table below explains the Redirect To Interface Profile Command.
Command ID | Redirect To Interface Profile |
Command Name | Redirect To Interface Profile |
Parameter Type | Multiple |
Parameter | Parameter 1 - Interface Profile ID Parameter 2 - (Change UOM, Change Batch, Change Serial No, Payment, POS Closing Entry, Transaction Details, Transaction Return, Serial Batch Lookup Cancel, AR Payment, AR Payment Details) |
Command Function | The command is used to switch the current POS interface to a different predefined interface profile. |
This can be useful for various reasons, such as:
Customizing User Experience:
Different interface profiles can be tailored for specific tasks or user roles, enhancing usability and efficiency.
Adapting to Different Scenarios:
Switch to an interface that is better suited for specific sales scenarios, such as promotions or seasonal sales.
Testing and Development:
Easily switch between profiles to test new layouts or configurations without disrupting the main interface.
This command helps ensure that the POS system can be quickly adapted to meet different operational needs.
55. Reload
The table below explains the Reload Command.
Command ID | Reload |
Command Name | Reload |
Parameter Type | Single |
Parameter | Reload the Entire Screen |
Command Function | The command is used to refresh or restart the POS software. |
This can be necessary for several reasons:
System Updates:
Applying updates or patches to the POS software.
Error Resolution:
Fixing issues or glitches that may have occurred during operation.
Configuration Changes:
Implementing new settings or configurations that require a restart to take effect.
Performance Improvement:
Enhancing system performance by clearing temporary data and refreshing the system.
Using the 'Reload' command ensures that the POS system runs smoothly and efficiently, minimizing downtime and maintaining optimal performance.
56. Reprint Receipt
The table below explains the Reprint Receipt Command.
Command ID | Reprint Receipt |
Command Name | Reprint Receipt |
Parameter Type | None |
Parameter | Not Applicable |
Command Function | The command allows you to generate a duplicate copy of a previously issued receipt. This can be useful in several scenarios, such as when a customer requests another copy of their receipt or if the original receipt was lost or damaged. This command ensures that customers can always have a copy of their transaction records, enhancing customer service and satisfaction. |
57. Reset Selected POS Items
The table below explains the Reset Selected POS Items Command.
Command ID | Reselect Selected POS Items |
Command Name | Reselect Selected POS Items |
Parameter Type | None |
Parameter | Not Applicable |
Command Function | The command is used to clear any changes or selections made to specific items in a transaction. This command helps ensure accuracy and efficiency in managing transactions, especially when dealing with multiple items. |
This command can be particularly useful in the following scenarios:
Undo Changes:
Revert any modifications made to the selected items, such as quantity adjustments or applied discounts.
Clear Selections:
Deselect items that were previously selected, effectively resetting them to their original state.
Error Correction:
Correct mistakes by resetting items to their default settings before finalizing the transaction.
58. Return From Fulfillment Wizard
The table below explains the Return From Fulfillment Wizard Command.
Command ID | Return From Fulfillment Wizard |
Command Name | Return From Fulfillment Wizard |
Parameter Type | None |
Parameter | Not Applicable |
Command Function | The command is used to manage the return process for items that have been fulfilled, such as those shipped to a customer or picked up in-store. This command helps streamline the return process, ensuring that returns are handled efficiently and accurately. |
59. Select All Grid Rows
The table below explains the Select All Grid Rows Command.
Command ID | Select All Grid Rows |
Command Name | Select All Grid Rows |
Parameter Type | None |
Parameter | Not Applicable |
Command Function | The command allows you to select all the rows in a data grid simultaneously. |
This can be particularly useful for performing bulk actions on multiple items or transactions at once. Some of the common uses are listed below:
Bulk Editing:
Modify multiple records at the same time.
Batch Deletion:
Remove several items or transactions in one go.
Mass Updates:
Apply changes, such as price adjustments or status updates, to all selected rows.
Exporting Data:
Select all rows to export the data for reporting or analysis.
This command helps streamline operations by reducing the time and effort needed to manage large sets of data.
60. Select Delivery Plan
The table below explains the Select Delivery Plan Command.
Command ID | Select Delivery Plan |
Command Name | Select Delivery Plan |
Parameter Type | None |
Parameter | Not Applicable |
Command Function | The command allows you to choose the delivery method for a customer's order. |
This can include options such as:
Standard Delivery:
Regular shipping to the customer's address.
Express Delivery:
Faster shipping for an additional fee.
In-Store Pickup:
The customer picks up the order from a designated store location.
Scheduled Delivery:
Delivery at a specific date and time chosen by the customer.
This command helps ensure that the customer's delivery preferences are accurately recorded and fulfilled, enhancing the overall shopping experience.
61. Select Pickup Plan
The table below explains the Select Pickup Plan Command.
Command ID | Select Pickup Plan |
Command Name | Select Pickup Plan |
Parameter Type | None |
Parameter | Not Applicable |
Command Function | The 'Select Pickup Plan' command at a Point of Sale (POS) system allows you to manage and configure the pickup options for customer orders. |
This command typically includes the following functions:
Choosing Pickup Locations:
Allows customers to select the store or location where they want to pick up their order.
Scheduling Pickup Times:
Enables customers to choose a specific date and time for their pickup.
Managing Inventory:
Ensures that the selected items are available and reserved for pickup at the chosen location.
Finalizing Orders:
Completes the necessary steps to prepare the order for pickup, including payment processing and inventory adjustments.
This command helps streamline the pickup process, making it convenient for both customers and store staff.
62. Select Transaction Mode
The table below explains the Select Transaction Mode Command.
Command ID | Select Transaction Mode |
Command Name | Select Transaction Mode |
Parameter Type | None |
Parameter | Not Applicable |
Command Function | The command allows the user to choose the type of transaction they want to process. |
This can include various modes such as:
Sales Mode:
For regular sales transactions.
Return Mode:
For processing returns and refunds.
Fulfillment Mode:
For store pickups and home delivery.
Layaway Mode:
For transactions where the customer pays in installments.
Quotation Mode:
For generating price quotes without completing a sale.
Order Mode:
For handling special orders or pre-orders.
This command helps streamline the transaction process by ensuring the POS system is set up correctly for the specific type of transaction being processed.
63. Set POS Closing Amount
The table below explains the Set POS Closing Amount Command.
Command ID | Set POS Closing Amount |
Command Name | Set POS Closing Amount |
Parameter Type | None |
Parameter | Not Applicable |
Command Function | The command is used to enter the final cash amount in the cash drawer at the end of a business day. This command helps in reconciling the cash drawer by comparing the actual cash on hand with the expected amount based on the day's transactions. |
Some of the key functions are listed below:
Cash Reconciliation:
Ensures that the cash in the drawer matches the sales recorded in the POS system.
End-of-Day Reporting:
Facilitates accurate financial reporting by providing a clear record of the closing amount.
Error Detection:
Helps identify discrepancies or errors in cash handling throughout the day.
Preparation for Next Day:
Prepares the POS system for the next business day by finalizing the cash drawer balance.
64. Set Quantity
The table below explains the Set Quantity Command.
Command ID | Set Quantity |
Command Name | Set Quantity |
Parameter Type | None |
Parameter | Not Applicable |
Command Function | The command allows you to specify the quantity of an item being sold or managed in the Point of Sale (POS). This can be particularly useful for inventory management, ensuring accurate sales records, and handling bulk purchases or sales. |
65. Show Balance Stock
The table below explains the Show Balance Stock Command.
Command ID | Show Balance Stock |
Command Name | Show Balance Stock |
Parameter Type | Single |
Parameter | Parameter - 1 Interface Profile(ID) |
Command Function | The command allows the cashier to 'view the current stock levels' of items in the inventory. This command is useful for checking the availability of products in real-time, helping to manage stock efficiently and inform customers about product availability. |
66. Show Fulfilled Items
The table below explains the Show Fulfilled Items Command.
Command ID | Show Fulfilled Items |
Command Name | Show Fulfilled Items |
Parameter Type | None |
Parameter | Not Applicable |
Command Function | The command allows the cashier to 'display a list of items that have been fulfilled' in an order. This is useful for verifying which items have already been processed and delivered, ensuring accurate tracking and management of order fulfillment. |
67. Show Popup
The table below explains the Show Popup Command.
Command ID | Show Popup |
Command Name | Show Popup |
Parameter Type | Multiple |
Parameter | Parameter 1 - Interface Profile ID Parameter 2 - Default POS Commands to Trigger on Defined Field |
Command Function | The command is used to 'display a pop-up message' on the screen. This can be useful for alerting the cashier to important information, such as a reminder, a warning, or a confirmation prompt. The pop-up can include custom messages and buttons for the cashier to interact with. |
68. Start Manager Override
The table below explains the Start Manager Override Command.
Command ID | Start Manager Override |
Command Name | Start Manager Override |
Parameter Type | None |
Parameter | Not Applicable |
Command Function | The command allows a cashier to 'request managerial approval' for certain restricted actions. This might include processing large returns, applying significant discounts, or overriding system limits. |
69. Submit POS Closing
The table below explains the Submit POS Closing Command.
Command ID | Submit POS Closing |
Command Name | Submit POS Closing |
Parameter Type | None |
Parameter | Not Applicable |
Command Function | The command is used to ‘finalize the day’s transactions’. |
This command typically involves.
Reconciling the cash drawer:
Ensuring that the cash in the drawer matches the recorded sales.
Generating end-of-day reports:
Producing reports that summarize the day's sales, returns, and other transactions.
Closing the register:
Marking the register as closed for the day, which prevents further transactions until it is reopened
70. Suspend Recall
The table below explains the Suspend Recall Command.
Command ID | Suspend Recall |
Command Name | Suspend Recall |
Parameter Type | Single |
Parameter | Parameter 1 - Interface Profile ID |
Command Function | The command allows the cashier to 'retrieve and resume a suspended transaction'. This is useful when a transaction is paused or interrupted and needs to be completed later. By using this command, the cashier can quickly bring up the suspended transaction and continue processing it from where it was left off. |
71. Suspended Transaction Search
The table below explains the Suspend Transaction Search Command.
Command ID | Suspended Transaction Search |
Command Name | Suspended Transaction Search |
Parameter Type | None |
Parameter | Not Applicable |
Command Function | The command allows the cashier to 'locate and resume suspended transactions'. This command is useful for finding transactions that were paused and need to be completed later. It helps in quickly identifying and recalling these transactions, ensuring they can be resumed and finalized efficiently. |
72. Sync Masters
The table below explains the Sync Masters Command.
Command ID | Sync Masters |
Command Name | Sync Masters |
Parameter Type | None |
Parameter | Not Applicable |
Command Function | The command is used to 'synchronize master data' between the POS and the warehouse. This includes updating product information, pricing, promotions, and other critical data to ensure consistency across all POS. |
73. Total Discount Amount
The table below explains the Total Discount Mode Command.
Command ID | Total Discount Amount |
Command Name | Total Discount Amount |
Parameter Type | None |
Parameter | Not Applicable |
Command Function | The command allows the cashier to 'apply a specific monetary discount' to the entire transaction. This command is useful for providing a fixed amount off the total purchase, rather than a percentage-based discount. It applies only to discountable items and respects the maximum discount amount set in the POS system's permissions. |
74. Total Discount Percent
The table below explains the Total Discount Percent Command.
Command ID | Total Discount Percent |
Command Name | Total Discount Percent |
Parameter Type | None |
Parameter | Not Applicable |
Command Function | The command allows the cashier to 'apply a percentage-based discount' to the entire transaction. This command is useful for providing a uniform discount across all eligible items in a sale. It respects the maximum discount percentage set in the POS system's permissions. |
75. Transaction Mode - Fulfillment
The table below explains the Transaction Mode - Fulfillment Command.
Command ID | Fulfillment |
Command Name | Fulfillment |
Parameter Type | None |
Parameter | Not Applicable |
Command Function | The command allows the cashier to manage 'order fulfillment processes'. This includes accepting orders, marking them as shipped, and initiating store pickups. It's designed to streamline the handling of orders that need to be fulfilled from the store, ensuring efficient processing and accurate inventory management. |
76. Transaction Mode - Gift Certificate
The table below explains the Transaction Mode - Gift Certificate Command.
Command ID | Gift Certificate |
Command Name | Gift Certificate |
Parameter Type | None |
Parameter | Not Applicable |
Command Function | The command allows the cashier to sell gift certificates at the POS. |
77. Transaction Mode - Gift Certificate Cashback
The table below explains the Transaction Mode - Gift Certificate Cashback Command.
Command ID | Gift Certificate Cashback |
Command Name | Gift Certificate Cashback |
Parameter Type | None |
Parameter | Not Applicable |
Command Function | The command allows the cashier to 'refund the remaining balance' of a gift certificate to the customer in cash. This mode is used when a customer wants to convert the unused balance of their gift certificate into physical cash. |
78. Transaction Mode - Gift Certificate Recharge
The table below explains the Transaction Mode - Gift Certificate Recharge Command.
Command ID | Gift Certificate Recharge |
Command Name | Gift Certificate Recharge |
Parameter Type | None |
Parameter | Not Applicable |
Command Function | The command allows the cashier to 'add monetary value to an existing gift certificate'. This mode is used when a customer wants to increase the balance on their gift certificate, ensuring the new amount is correctly recorded and available for future purchases. |
79. Transaction Mode - Sale
The table below explains the Sale Command.
Command ID | Sale |
Command Name | Sale |
Parameter Type | None |
Parameter | Not Applicable |
Command Function | The command is used to 'initiate a standard sales transaction'. This mode allows the cashier to scan items, apply discounts, and process payments, effectively recording the sale and updating inventory. |
80. Transaction Mode - Sale Return
The table below explains the Sale Return Command.
Command ID | Sale Return |
Command Name | Sale Return |
Parameter Type | None |
Parameter | Not Applicable |
Command Function | The command allows the cashier to process 'returns of previously purchased items'. This mode enables the system to handle the return transaction, ensuring that the returned items are correctly removed from inventory and the customer's payment is refunded or credited appropriately. |
81. Transaction Mode - Item Return
The table below explains the Item Return Command.
Command ID | Item Return |
Command Name | Item Return |
Parameter Type | None |
Parameter | Not Applicable |
Command Function | The command allows the cashier to process 'returns of individual items' from a transaction. This mode ensures that the returned items are correctly removed from the inventory and the customer's payment is refunded or credited accordingly. |
82. Transaction Search
The table below explains the Transaction Search Command.
Command ID | Transaction Search |
Command Name | Transaction Search |
Parameter Type | None |
Parameter | Not Applicable |
Command Function | The command allows users to 'locate specific transactions' by searching through the transaction history. This command is useful for finding details about past sales, refunds, or voids. Users can typically search by various criteria such as transaction ID, date, item, or customer name. |
83. Void Item
The table below explains the Void Item Command.
Command ID | Void Item |
Command Name | Void Item |
Parameter Type | None |
Parameter | Not Applicable |
Command Function | The command 'removes a specific item' from an ongoing transaction. This is useful for correcting mistakes, such as if an item was scanned incorrectly or if a customer changes their mind about a purchase. When an item is voided, it is no longer included in the transaction total. |
84. Void Transaction
The table below explains the Void Transaction Command.
Command ID | Void Transaction |
Command Name | Void Transaction |
Parameter Type | None |
Parameter | Not Applicable |
Command Function | The command 'cancels a transaction' before it is fully processed. This means the transaction is effectively erased, and no funds are transferred from the customer's account to the merchant. It's typically used to correct mistakes or cancel sales that were entered incorrectly. |