Retail Transaction Posting

This article describes how iVendNext handles transaction posting with a focus on how a POS invoice is recorded.
Introduction
POS invoices are automatically generated upon transaction completion at the point of sale to streamline the checkout process. They temporarily record transactions in a separate "sub-ledger" without immediately updating stock and accounting ledgers, thereby enhancing the system's capacity to handle high transaction volumes. These invoices also ensure smooth data transfer between the POS system and the iVendNext backend.
POS Transaction Stages
Before we deep dive into how a POS POS invoice is recorded and posted it is important for us to understand the key stages a POS transaction goes through.
A Point of Sale (POS) transaction involves several key stages from the opening entry to the closing entry. Here's a breakdown of the typical stages:
Launch the application
Type the iVendNext URL in the browser. Login using your credentials. This will take you to the iVendNext Home screen. Navigate to the Retail section. Then under the Quick Access section click on the iVendNext POS shortcut to launch the POS screen.
POS Opening Entry
Start by specifying the opening amount and selecting the cash drawer. Specifying the opening amount by denomination ensures transparency and accuracy. This process initializes the POS system for the day by setting up the cash drawer, confirming that the POS system is on the network, and verifying that all the hardware devices, such as barcode scanners and receipt printers, are functioning properly.
As soon as you enter the Opening Amount, a POS Opening Entry is created in an "Open" state. This opening entry can be seen on the POS Opening Entry List View screen.
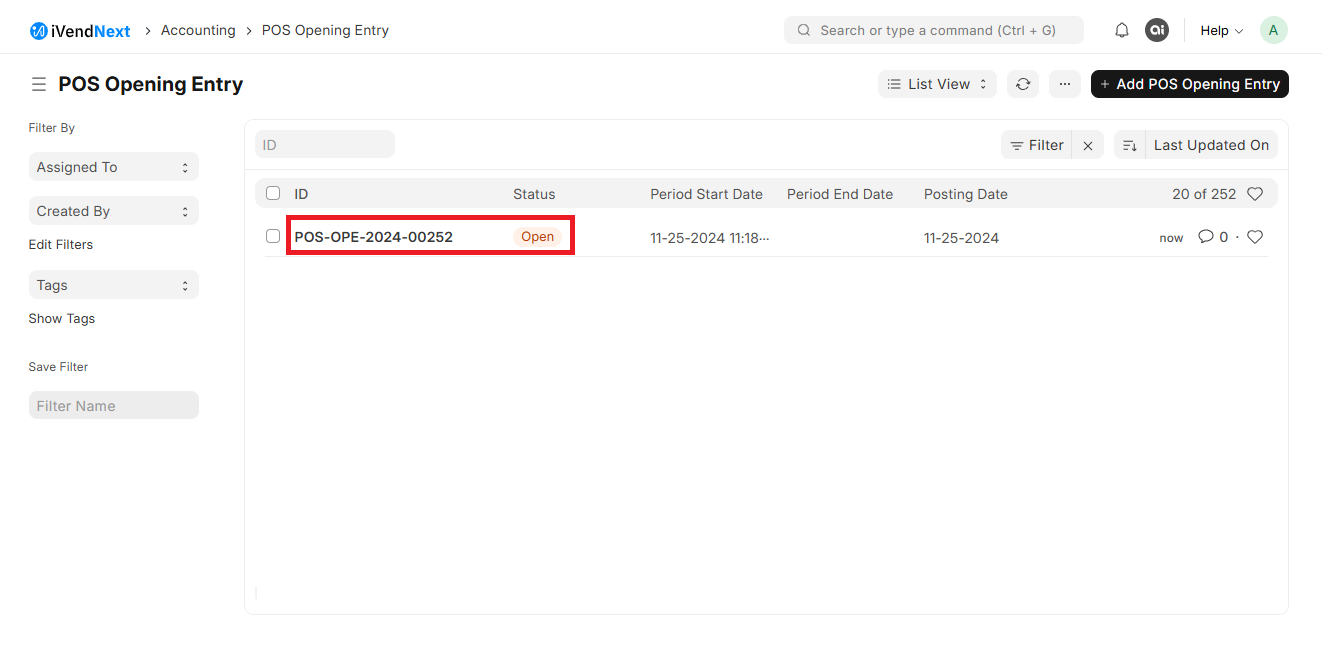
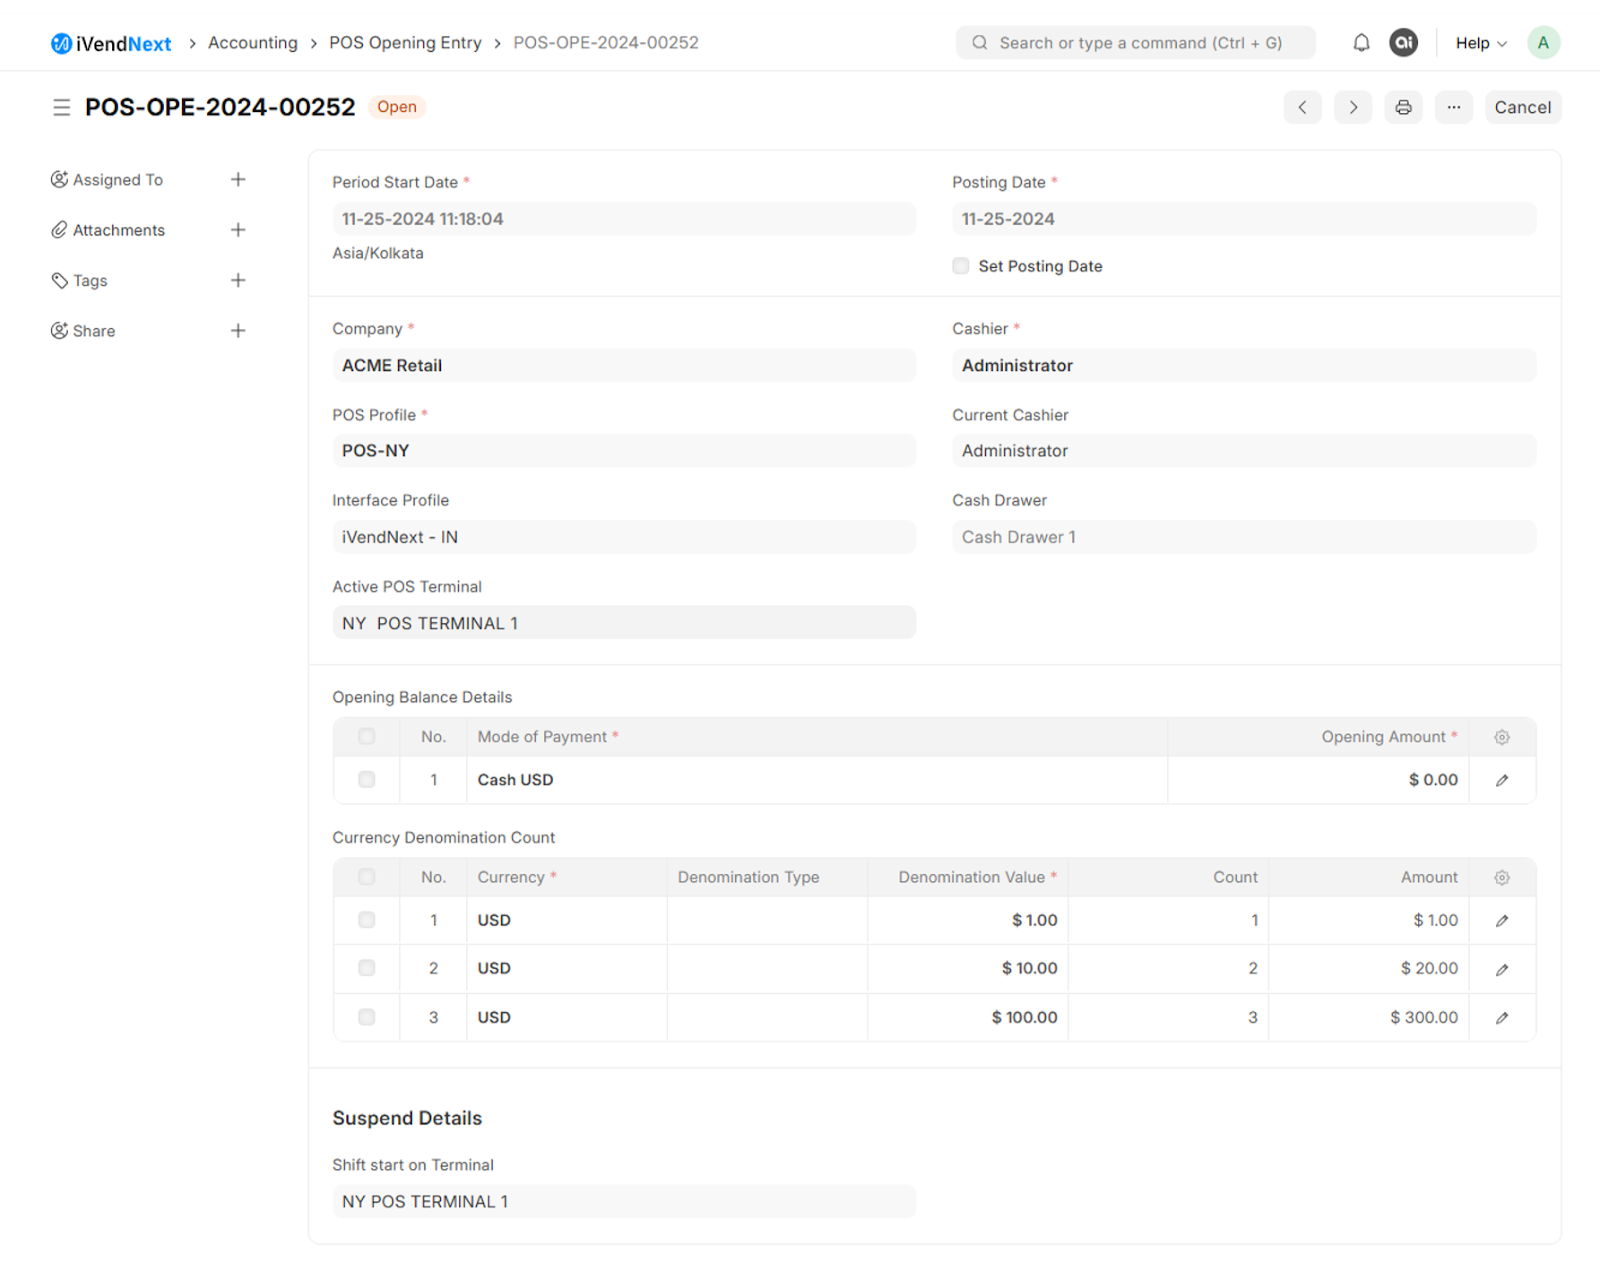
Click on the POS-OPE-2024-00252 entry to open the POS Opening Entry Details Screen. Some important piece of information that you can capture on this screen are listed below:
Period Start Date
Posting Date
Cashier
POS Profile
Cash Drawer
Active POS Terminal
Perform Transactions
Performing a transaction at the POS requires you to Select Item(s), and then Process Payment.
Item Selection: The customer selects the items they wish to purchase. These items are scanned or entered manually into the POS system, which then updates the inventory and calculates the total cost.
Payment Processing: The customer chooses a payment method (cash, credit/debit card, mobile payment, etc.). The POS system processes the payment by communicating with the payment processor to authorize the transaction.

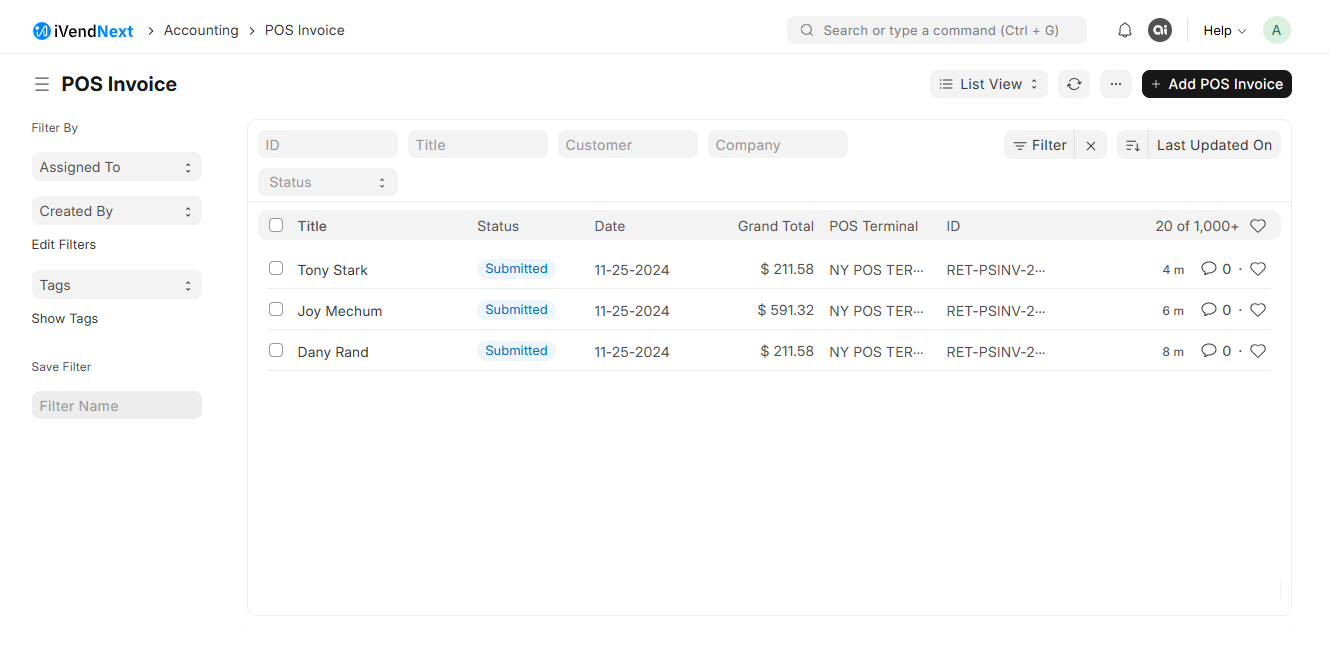
For illustration we have performed the following POS Transactions:
RET-PSINV-2024-04381
RET-PSINV-2024-04382
RET-PSINV-2024-04383

For each POS transaction performed an interim POS invoice was created. This can also be verified from the POS Invoice List View Screen.
Receipt Generation
Once the payment is approved, the POS generates a receipt. This receipt can be printed or sent digitally to the customer.
Inventory Update
The POS system automatically updates the inventory to reflect the items sold. This helps in maintaining accurate stock levels.
End-of-Day Reconciliation
At the end of the business day, the POS system reconciles all transactions by verifying total sales and counting the cash in the drawer to ensure that all transactions are accounted for.
Close the POS
Finally, the POS system is closed for the day. When the cashier closes the POS session, a single consolidated sales invoice is created by merging all intermediate POS invoices. This entire process is known as POS Invoice Consolidation. During consolidation, combined entries are made in the accounting and stock ledgers. The resulting consolidated sales invoice includes all items purchased by customers from the time the POS opens until it closes.
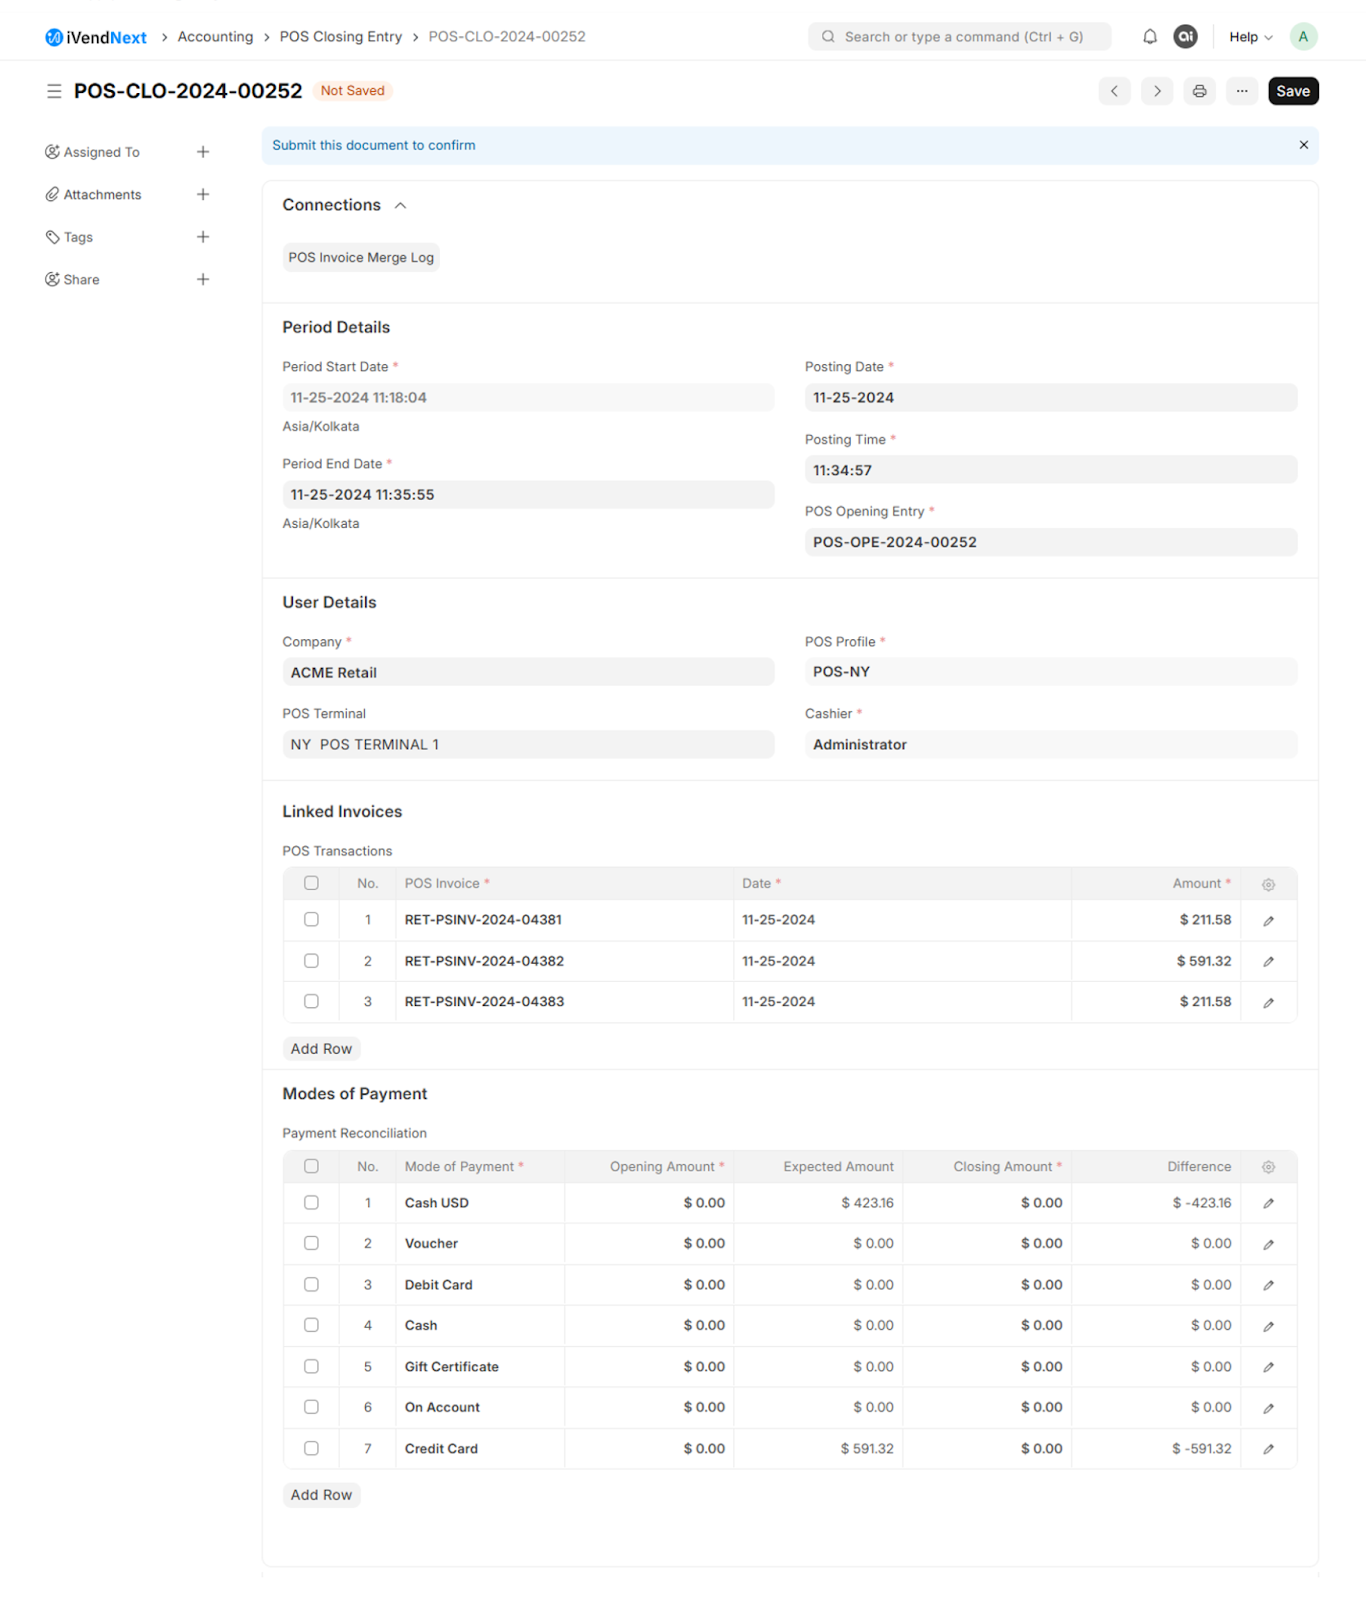
When you click the "Close POS" button, a POS Closing Entry is created in the "Draft" state.
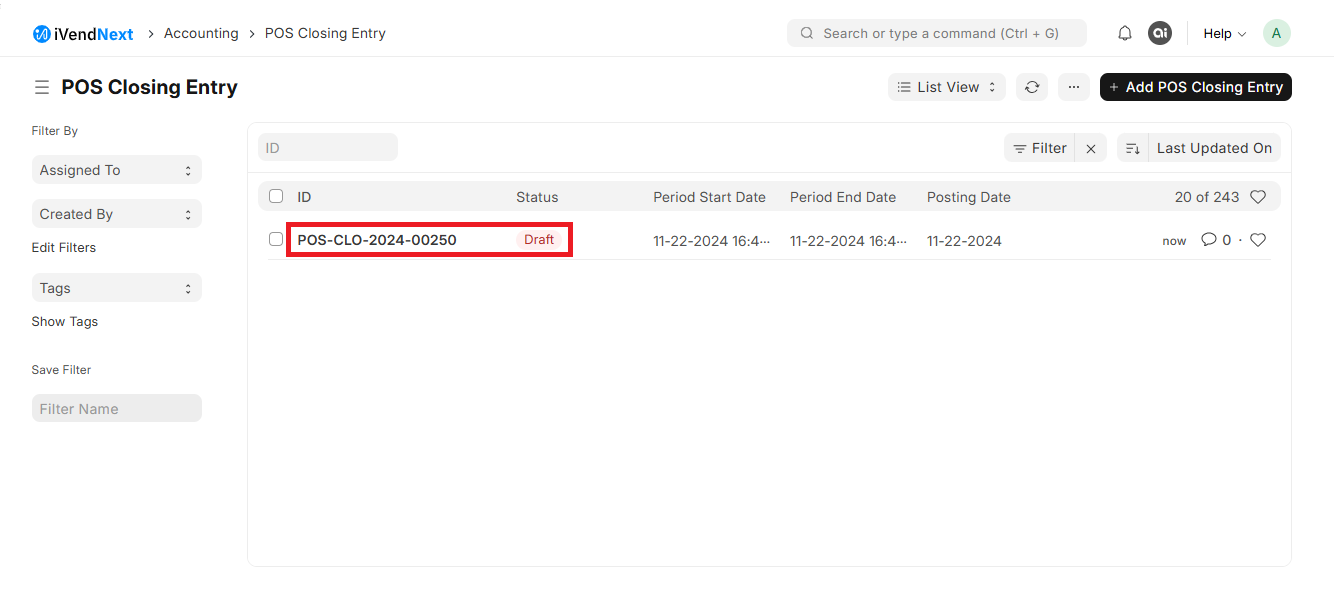
Click on the POS-OPE-2024-00252 entry to open the POS Closing Entry Details Screen. This will allow you to see the linked POS Interim Invoices.
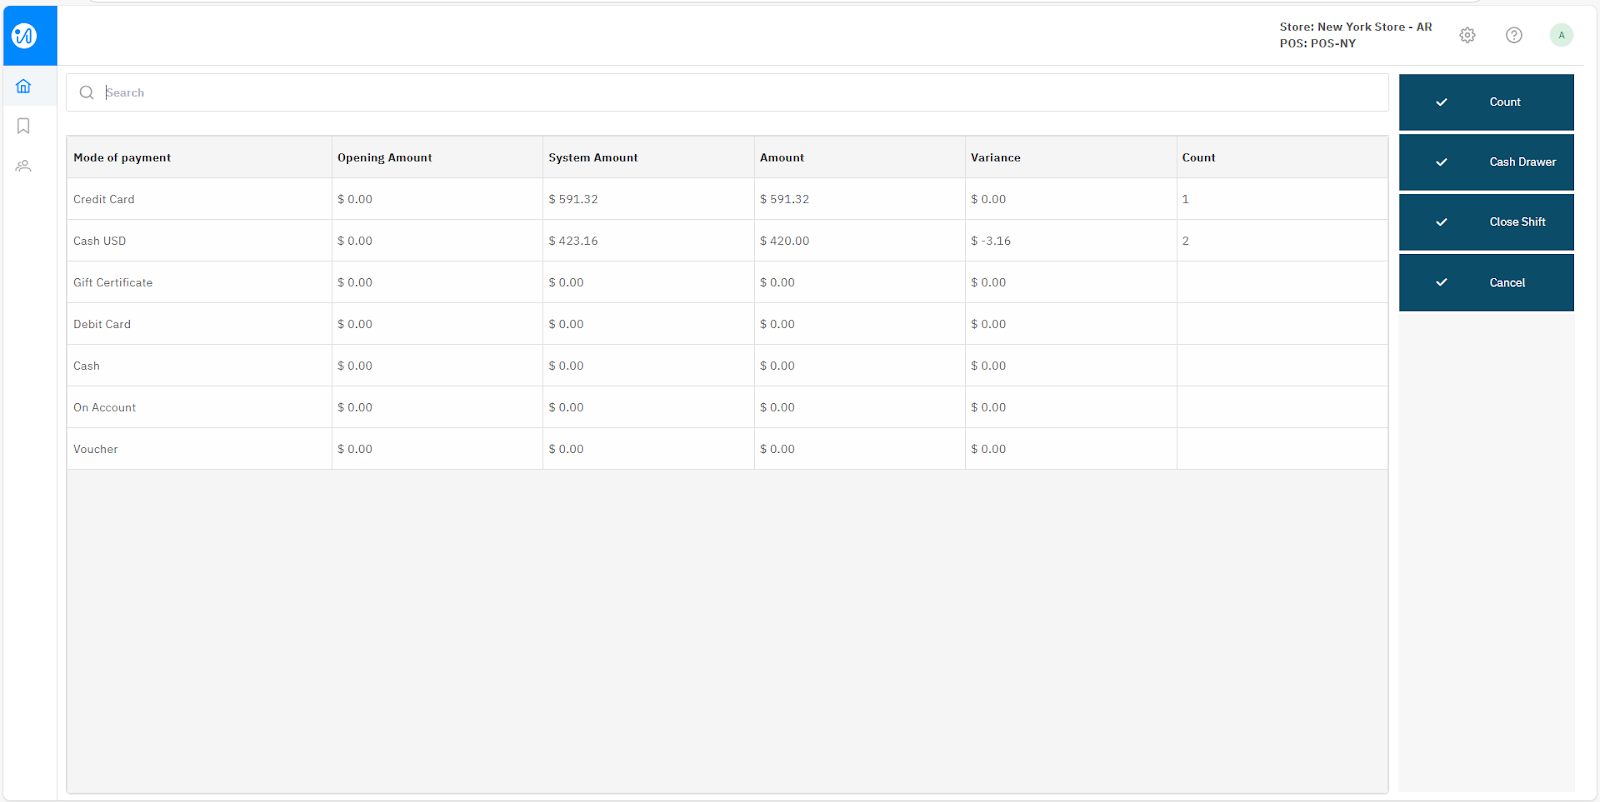
Count Tender
Count the tender on the Tender Count screen and fill in the details on the Tender Count Details screen. Click "Update."
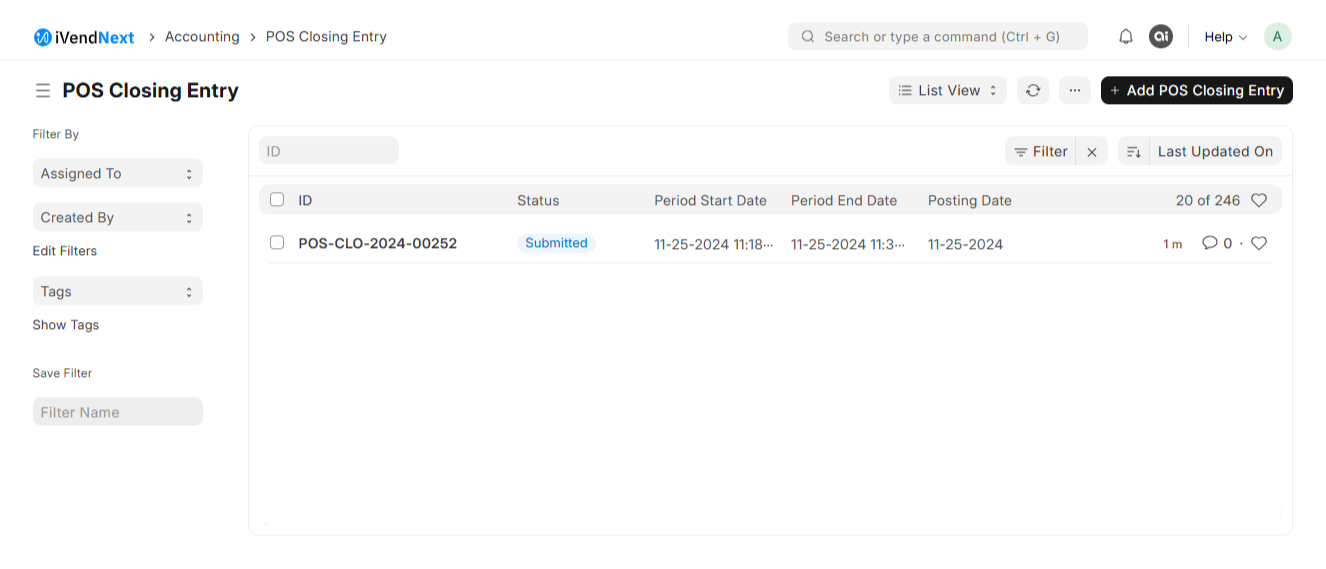
Close Shift
Press the "Close Shift" button to finalize the POS session. This action changes the previously created POS Closing Entry from Draft to Submitted.
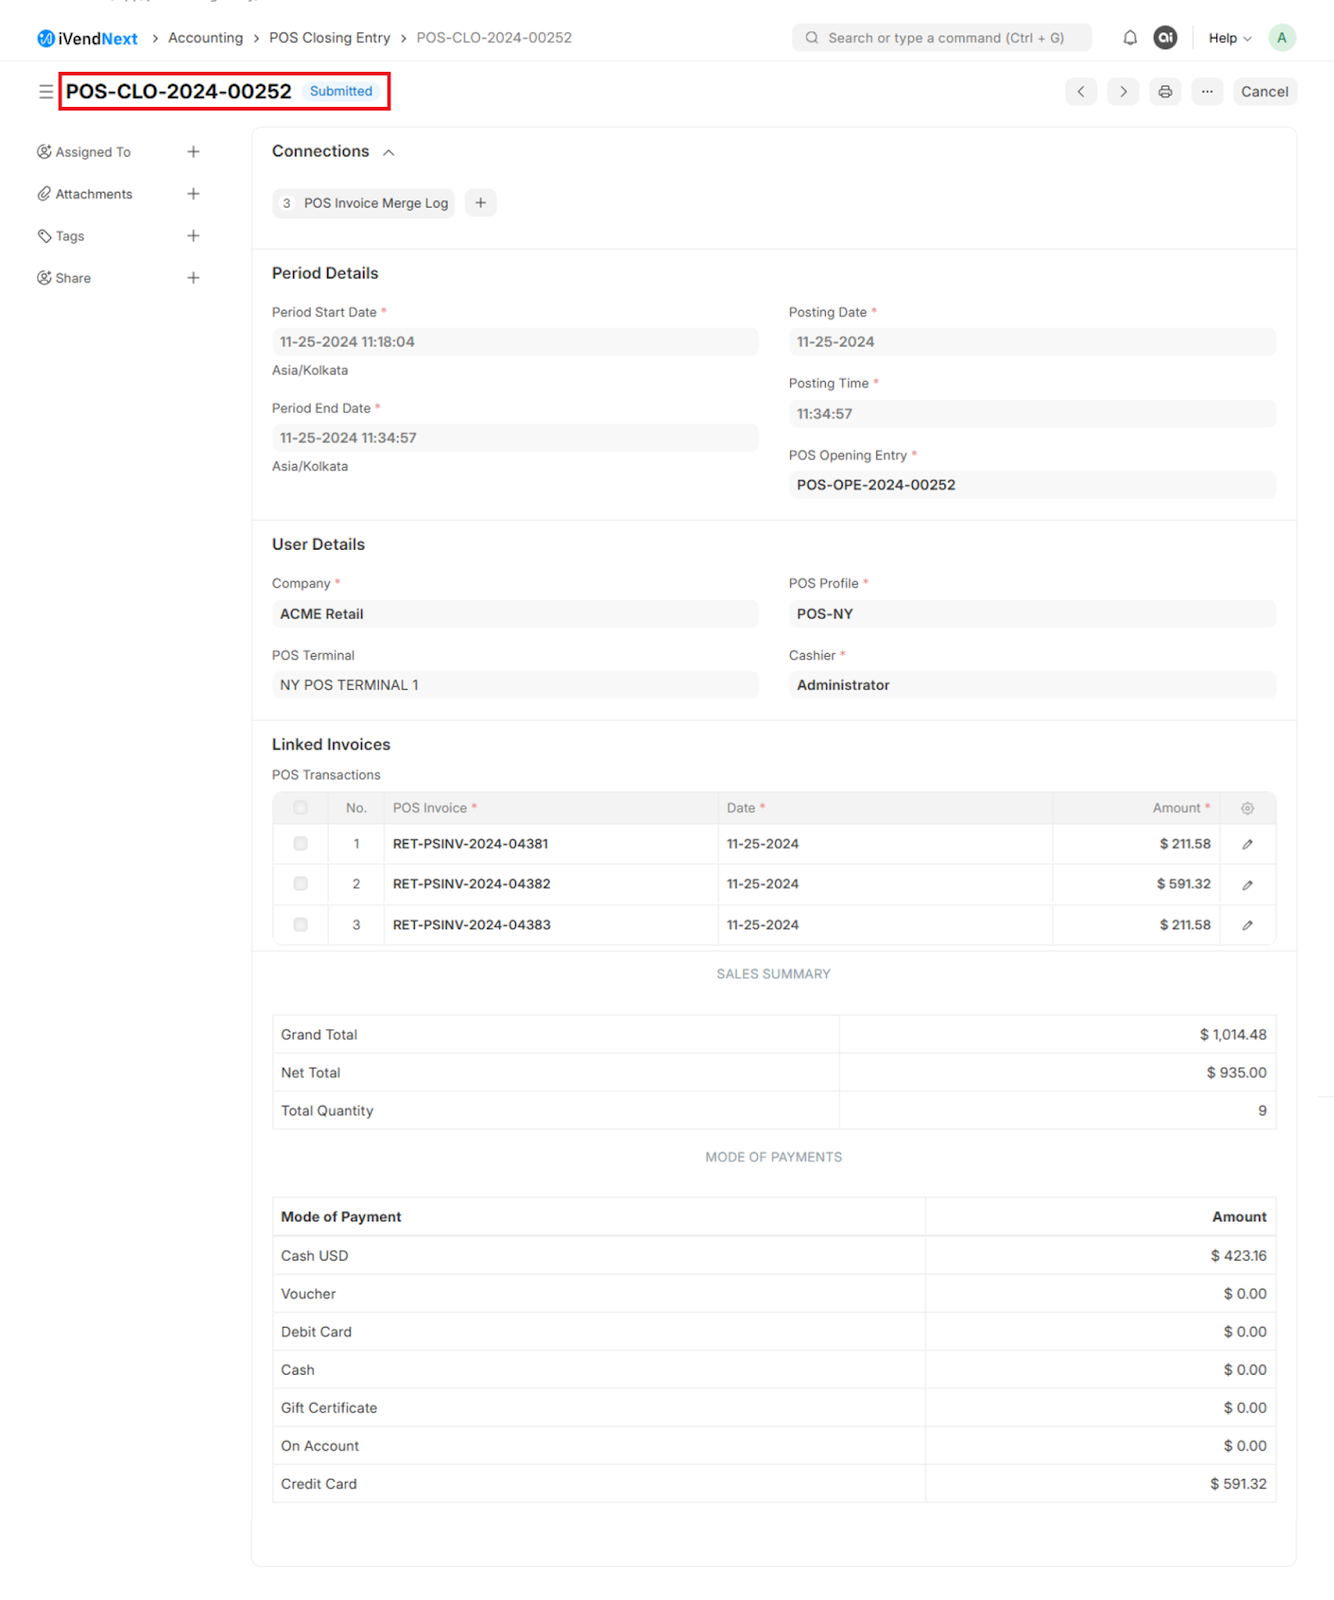
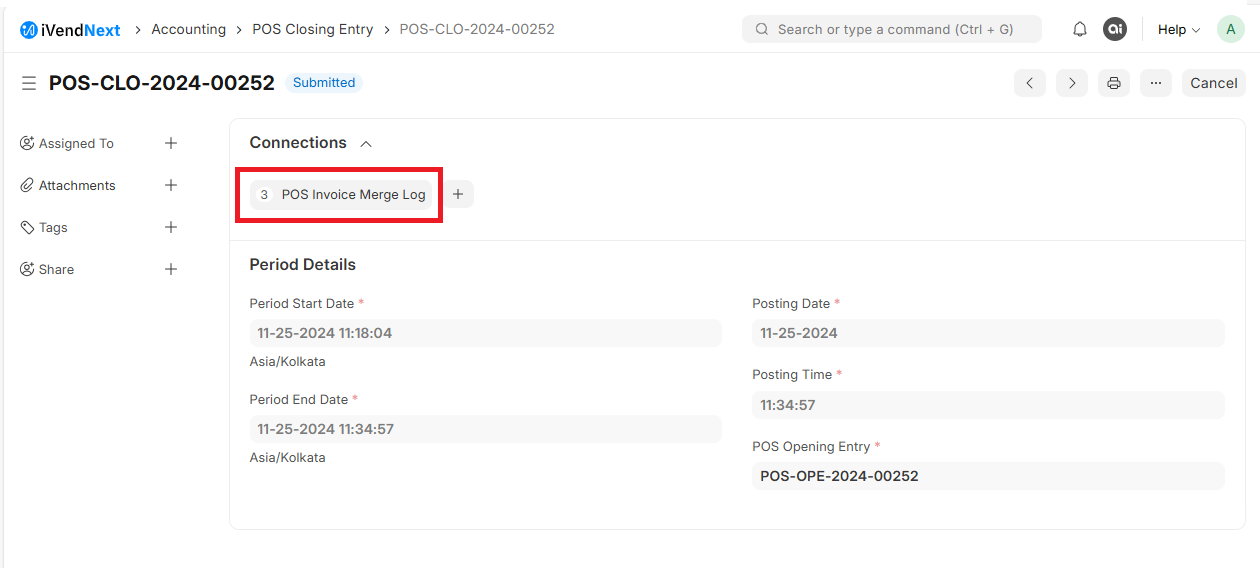
Click on the POS-OPE-2024-00252 entry to open the POS Closing Entry Details Screen. Some important piece of information that you can capture on this screen are listed below:
Status
Linked Invoices
These stages ensure that the transaction process is smooth, accurate, and efficient, benefiting both the business and the customer.
POS Invoice Merge Log
There is a section on the POS Closing Entry Details Screen called Connections. You will see a shortcut for POS Invoice Merge Log. ( As shown in the screenshot below)
Click on the POS Invoice Merge Log to reach the POS Invoice Merge Log Screen.
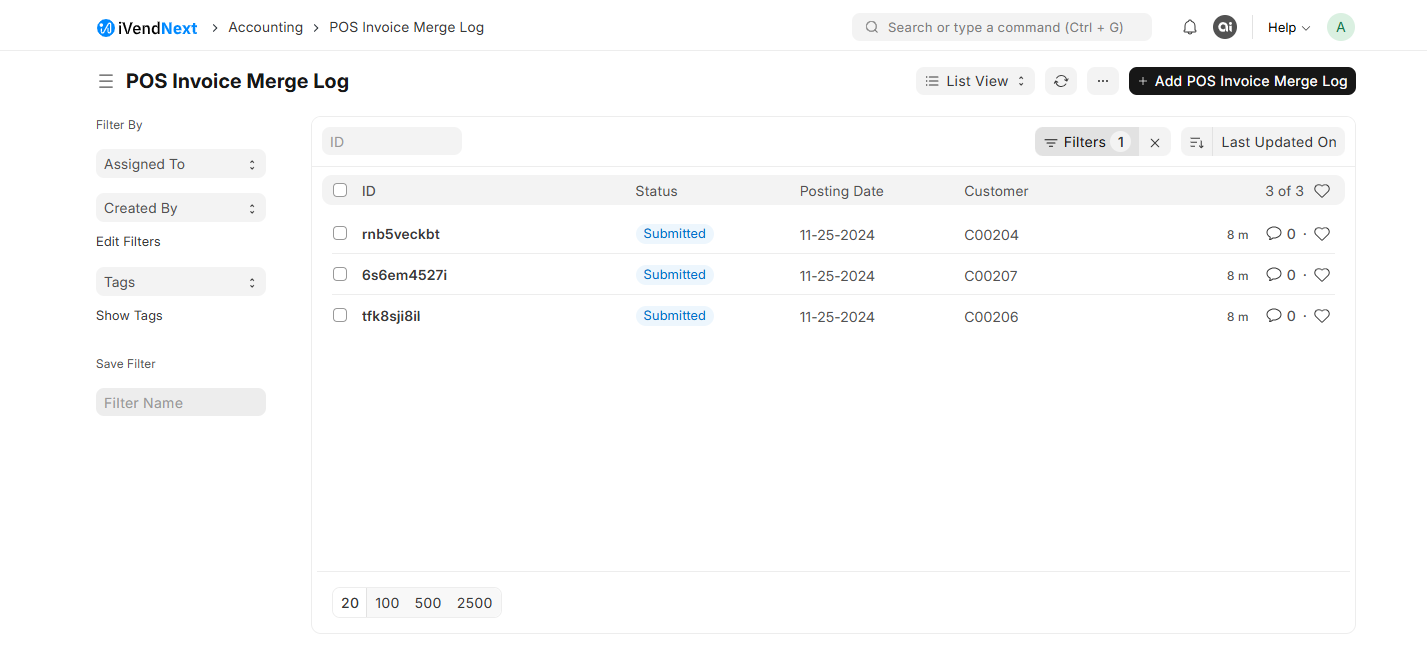
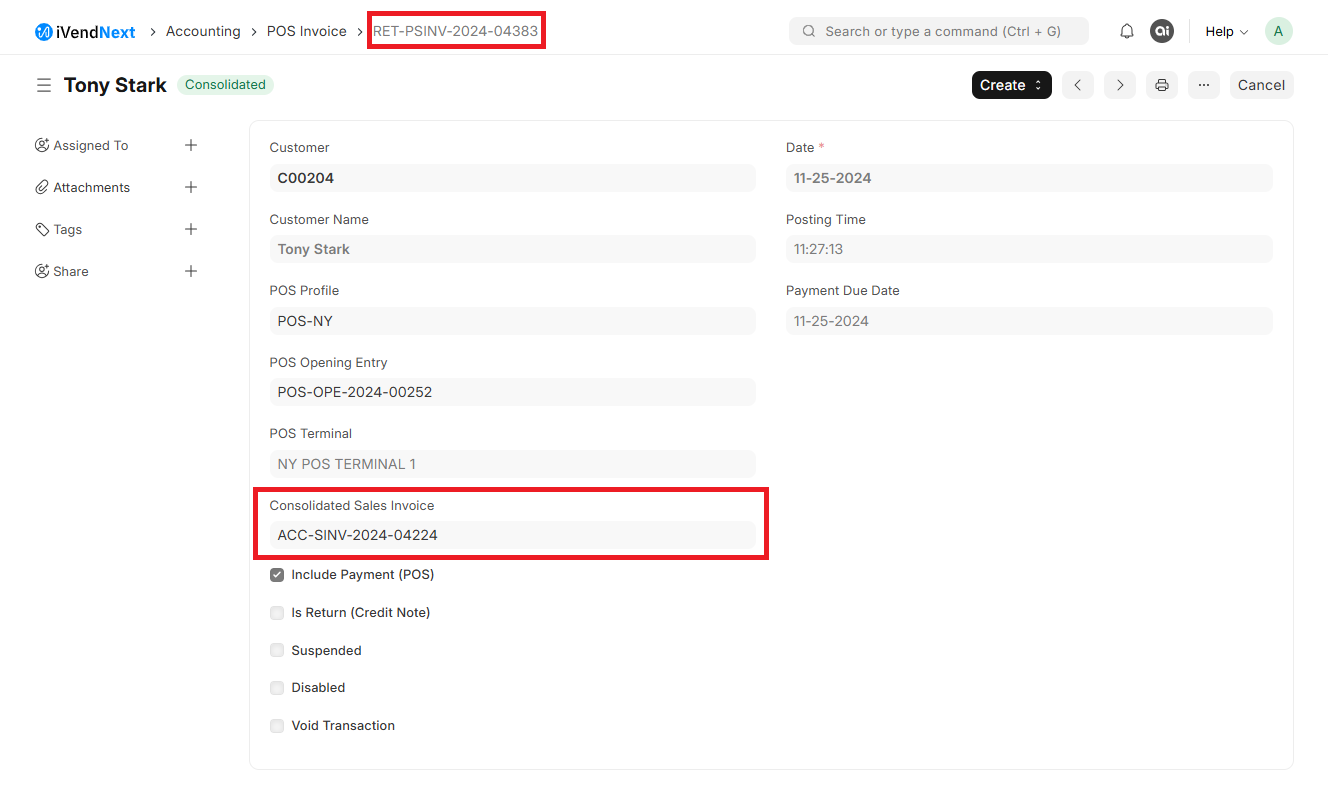
Click on the POS Invoice Merge Log ID displayed in the ID field. This will open the corresponding Consolidated Invoice. The screenshot below shows a consolidated invoice for Tony Stark.
POS Invoice Posting Settings
The moment you perform a transaction in iVendNext, an intermediate invoice called a POS invoice is created based on the POS Invoice Posting Settings. These settings can be found within the Company Setup. These settings play a vital role in determining how POS invoices are posted to the general ledger. It offers three distinct posting settings or methods which can be found within the system under the Company Setup. (Company Setup > POS Invoice Posting Settings)
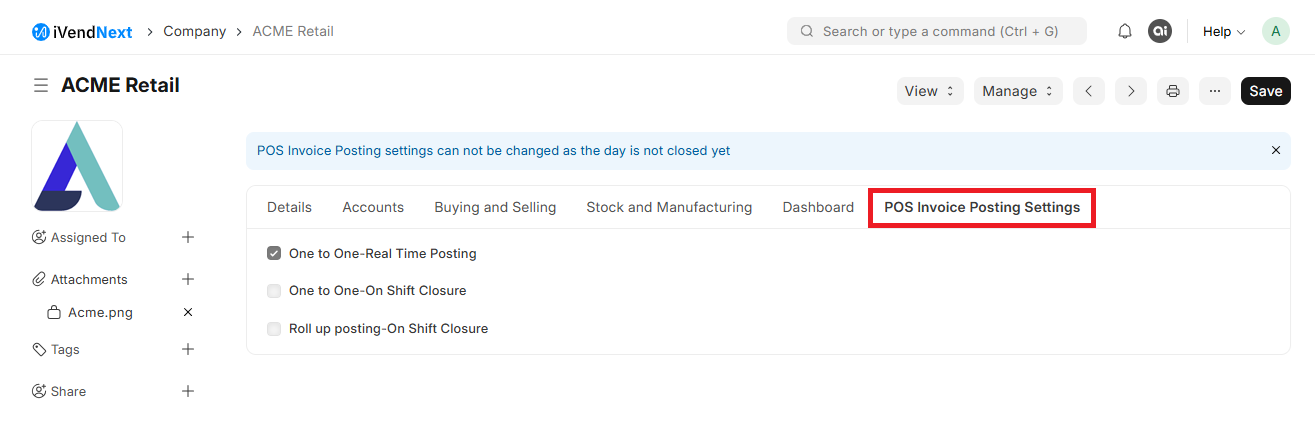
These settings offer flexibility for different business needs and accounting practices. The POS Invoice Posting setting influences how and when POS invoices impact the general ledger. However, it does not affect their creation process.The options include:
One to One - Real Time Posting:
Each POS transaction updates the ledger immediately.
One to One - On Shift Closure:
Each POS transaction is posted to the ledger at the end of the shift.
Rollup Posting - On Shift Closure:
Multiple POS transactions are consolidated into a single sales invoice and a single purchase/bill for expenses, and posted to the ledger at the end of the shift.
Related Articles
Important Retail Settings
This guide outlines the five key settings for retail operations: POS Invoice Posting Settings, POS Profile, POS Terminal, User, and POS Shift Profile. The guide emphasizes the importance of properly configuring each setting to ensure efficient ...Key Concepts in Retail
Key Concepts in Retail The provided sources outline various aspects of configuring and using the iVendNext Point of Sale (POS) system. Here's a detailed explanation of the key concepts and terms. Point of Sale (POS) A Point of Sale (POS) is the ...Stock Transfer
This document outlines the steps for transferring stock between stores. It also discusses the reports you can use to track inventory movement and balances, such as the Stock Ledger, Stock Balance, and Stock Summary reports. Introduction Stock ...Key Concepts in Inventory Management
Key Concepts in Inventory Management This article provides detailed information on the key concepts and features related to the Stock or Inventory Module in iVendNext. Understanding these concepts and features will enable you to effectively manage ...List of iVendNext POS Commands
Introduction To iVendNext POS Commands POS Commands refer to specific instructions or operations that can be executed within the POS software to perform various tasks. These commands are typically configured and managed in the POS system's back ...