Stock Transfer

Introduction
Stock Transfer refers to the process of moving inventory from one location to another within the same organization. This could be from one store to another or from a warehouse to a store. The main goal is to ensure that each location has the right amount of stock to meet customer demand.
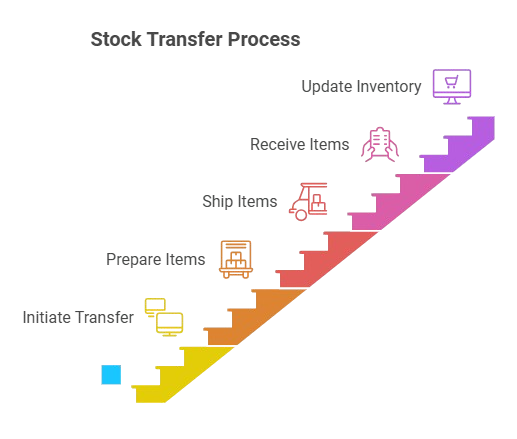
Here is a simple breakdown of the Stock Transfer process:
1. Initiate Transfer:
A request is made to move certain items.
2. Prepare Items:
The items are picked and packed for transfer.
3. Ship Items:
The items are sent to the new location.
4. Receive Items:
The new location receives and checks the items.
5. Update Inventory:
The inventory levels are updated in the POS system to reflect the transfer.
This helps in maintaining optimal stock levels and improving overall inventory management.
Stock Transfer Process
Let us try to understand the Stock Transfer process with the help of an example.
We will using the below data set for illustration:
Item Name - Women’s Bag
Item Code - WB-1003
Item Description - Block Signature Tote
Item Type - Standard
Source Store - Houston
Destination Store - New York
Scenario:
Transfer 5 units of Item (WB-1003) from Houston Store to New York Store.
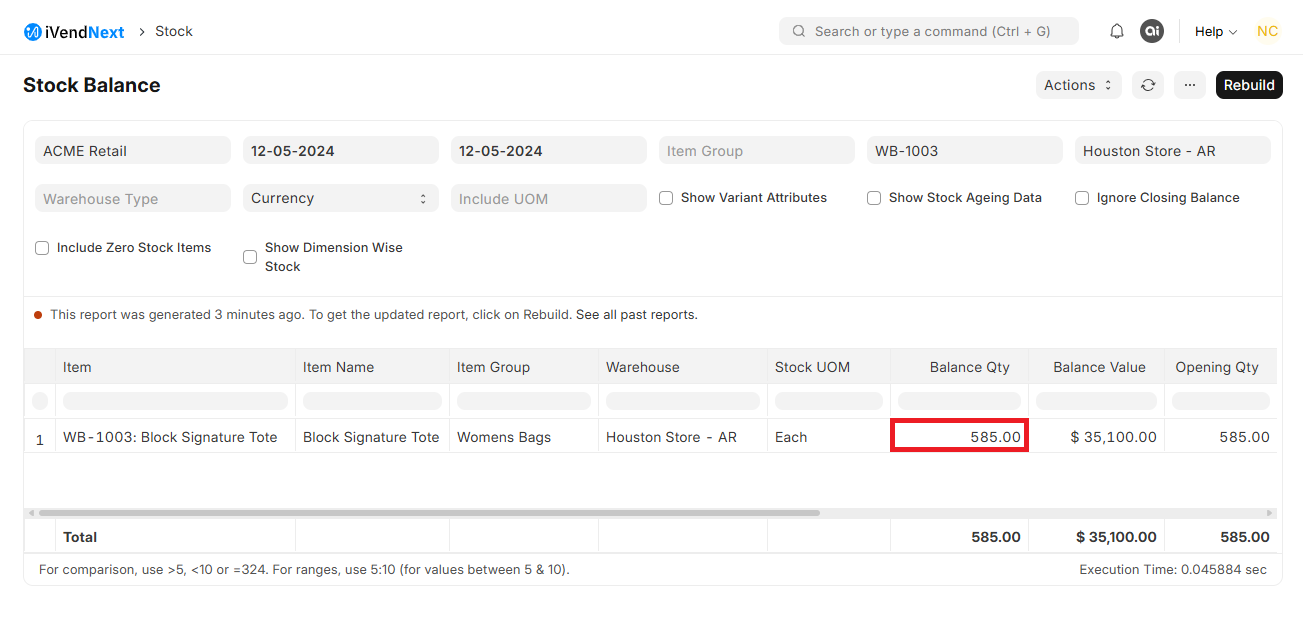
Stock Balance at Houston Store Before Transfer
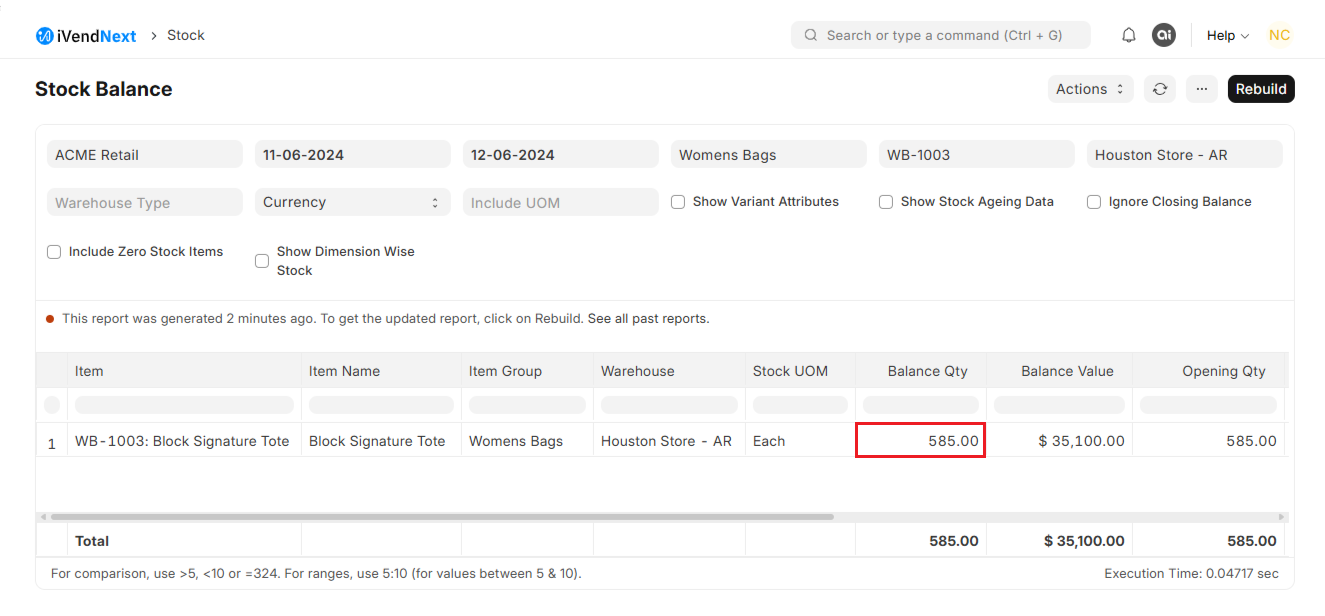
The stock balance of Item (WB-1003) at the Houston Store on 12-06-2024 is 585 units. This is evident from the below screenshot of the Stock Balance Report.
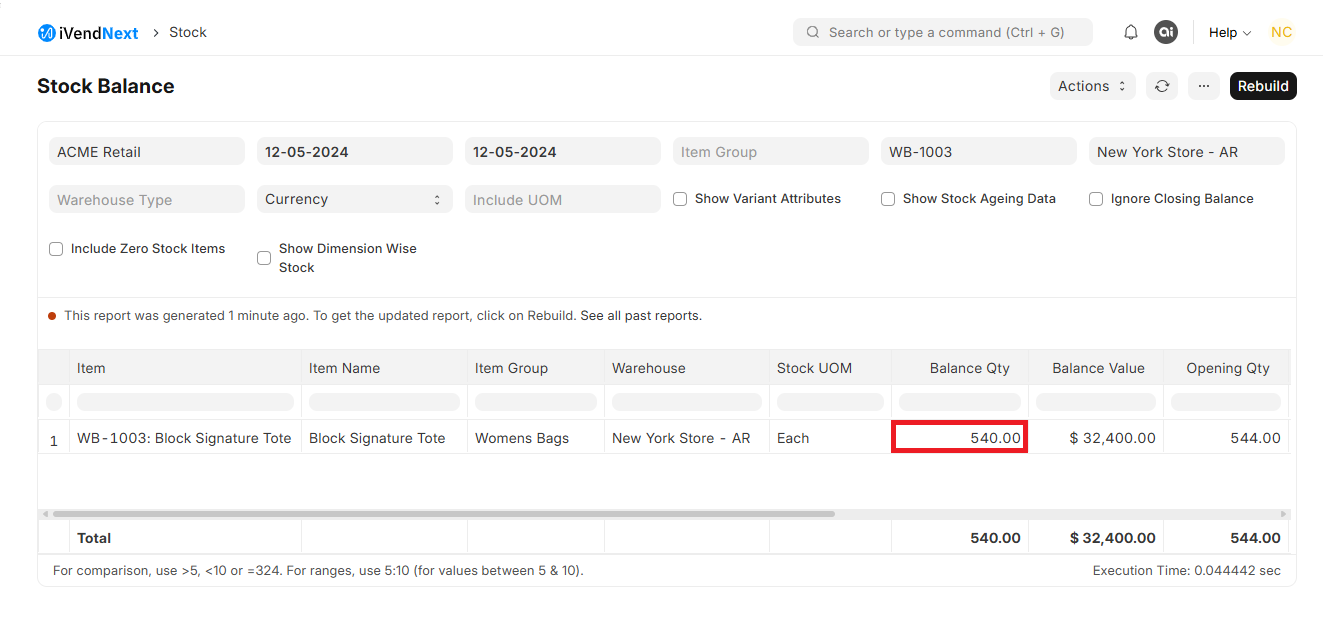
Stock Balance at New York Store Before Transfer
The stock balance of Item (WB-1003) at the New York Store on 12-06-2024 is 540 units. This is evident from the below screenshot of the Stock Balance Report.
Steps to perform Stock Transfer
The steps to perform Stock Transfer are as follows:
1. Navigate to Stock Entry:
Navigate to: Home > Stock. Then under the Stock Transactions section click on the Stock Entry shortcut. This should take you to the Stock Entry List View Screen.
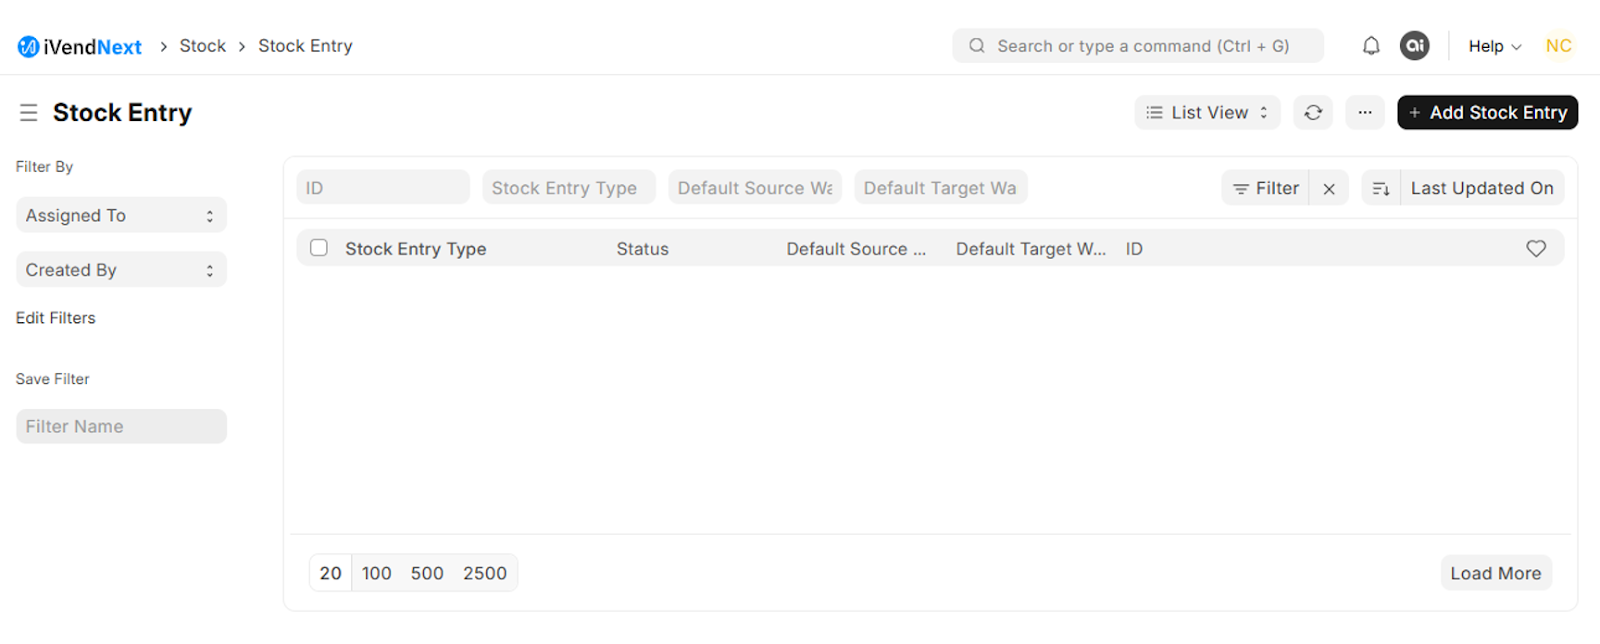
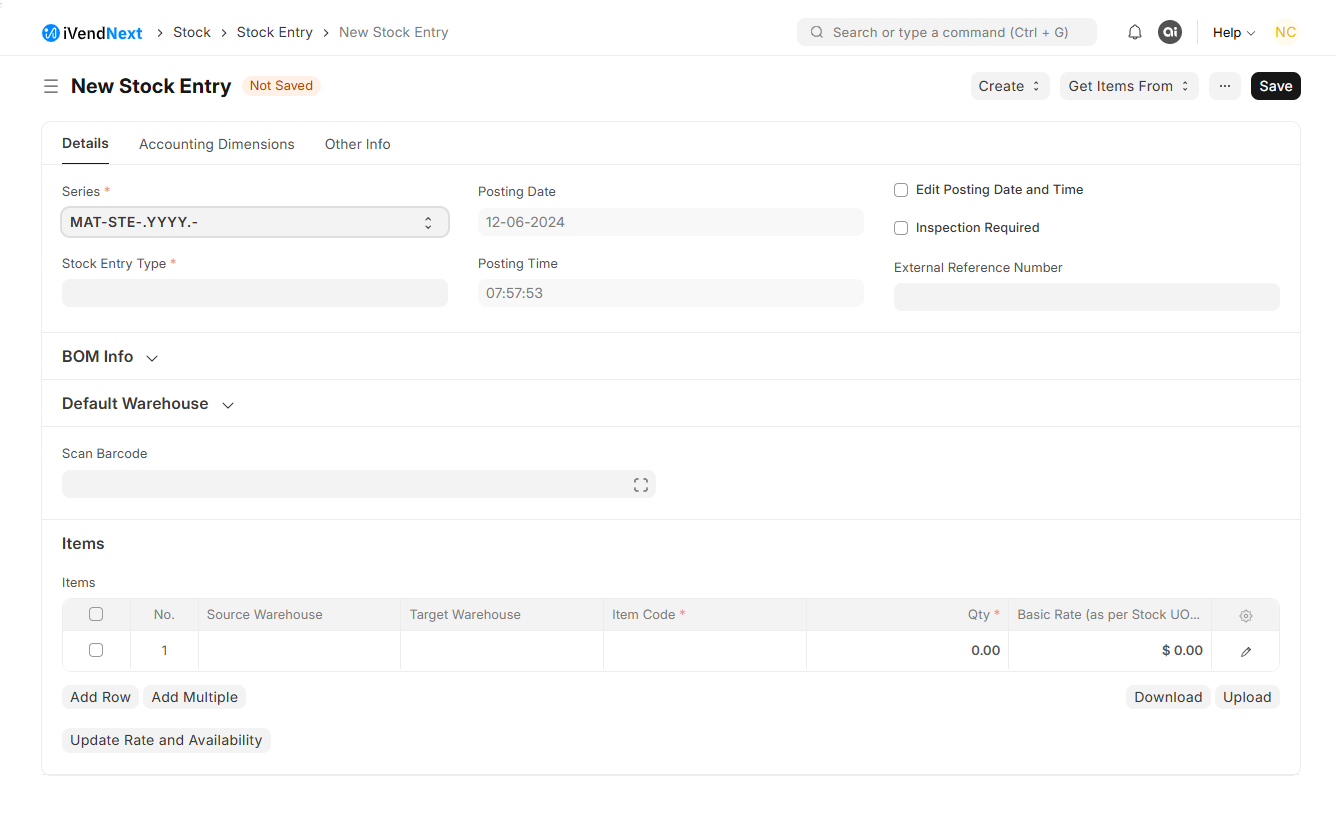
2. Initiate a New Stock Entry:
Click on Add Stock Entry to open the New Stock Entry Screen..
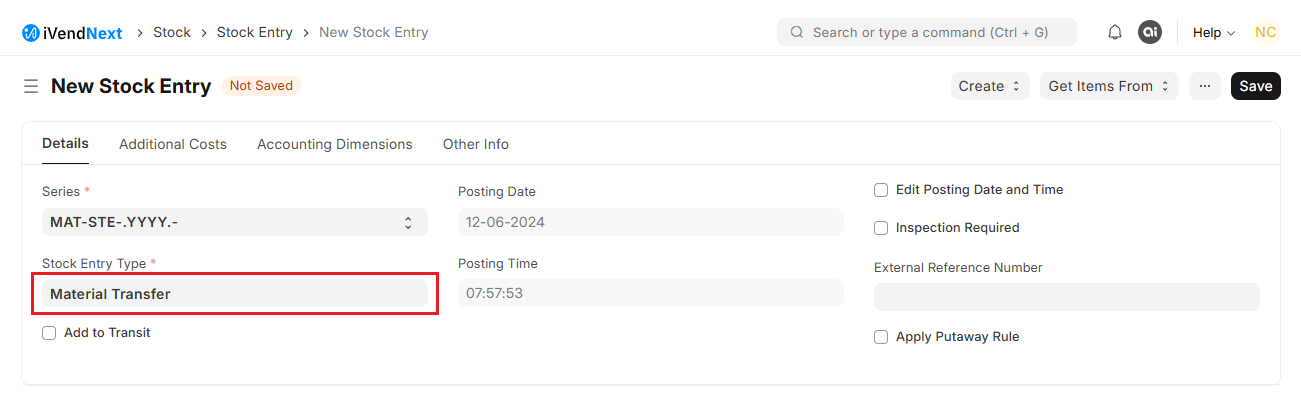
4. Select the Stock Entry Type:
Select Material Transfer as the Stock Entry Type. The Stock Entry Type field is a drop down field that lets you choose the purpose of the Stock Entry from options like Material Issue, Material Receipt, Material Transfer, etc.

Note:
The Stock Entry Document Series field will auto populate based on the Document Naming Series defined in the application.
Depending upon the value selected in the Stock Entry Type some additional fields may appear and some existing fields may disappear from the New Stock Entry Screen.
By default the Posting Date and the Posting Time fields are non-editable. You must put a tick against the "Edit Posting Date and Time" checkbox, if you want to make these fields editable.
You can make use of the Add To Transit feature. To enable the Add to Transit feature, simply check the Add to Transit checkbox. This action will create a record of the items being transferred to a transit warehouse. Once the items arrive at the destination warehouse, you will need to create another stock entry to move them from the transit warehouse to their final destination.
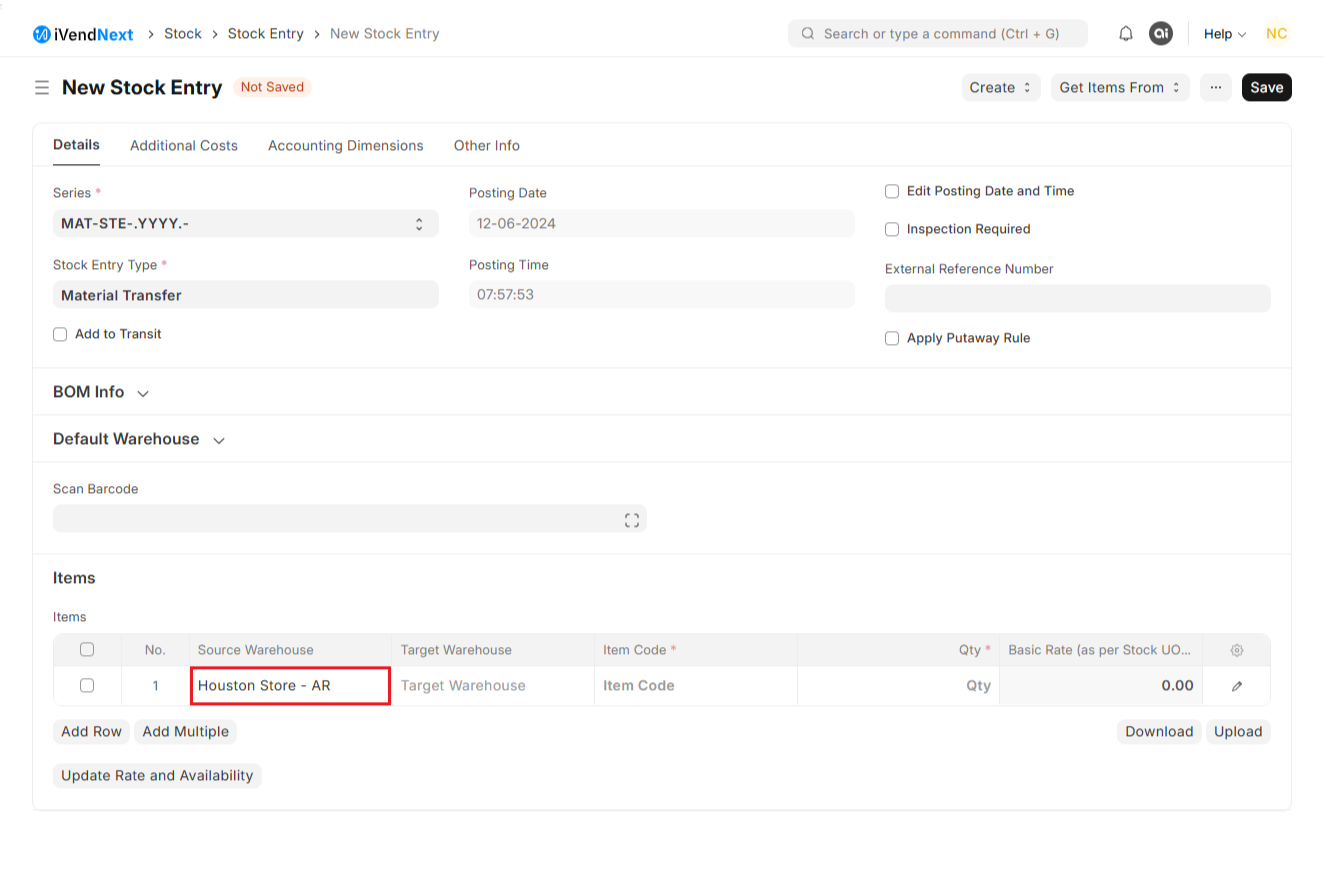
5. Set the Source Warehouse:
Specify the Source Warehouse (where the stock is coming from). The source warehouse is specified in the Items Table Template. In this illustration we are moving 5 units of Block Signature Tote from the Houston Store to the New York Store. So our source store will be the Houston Store and we need to specify that in the Source Warehouse field.
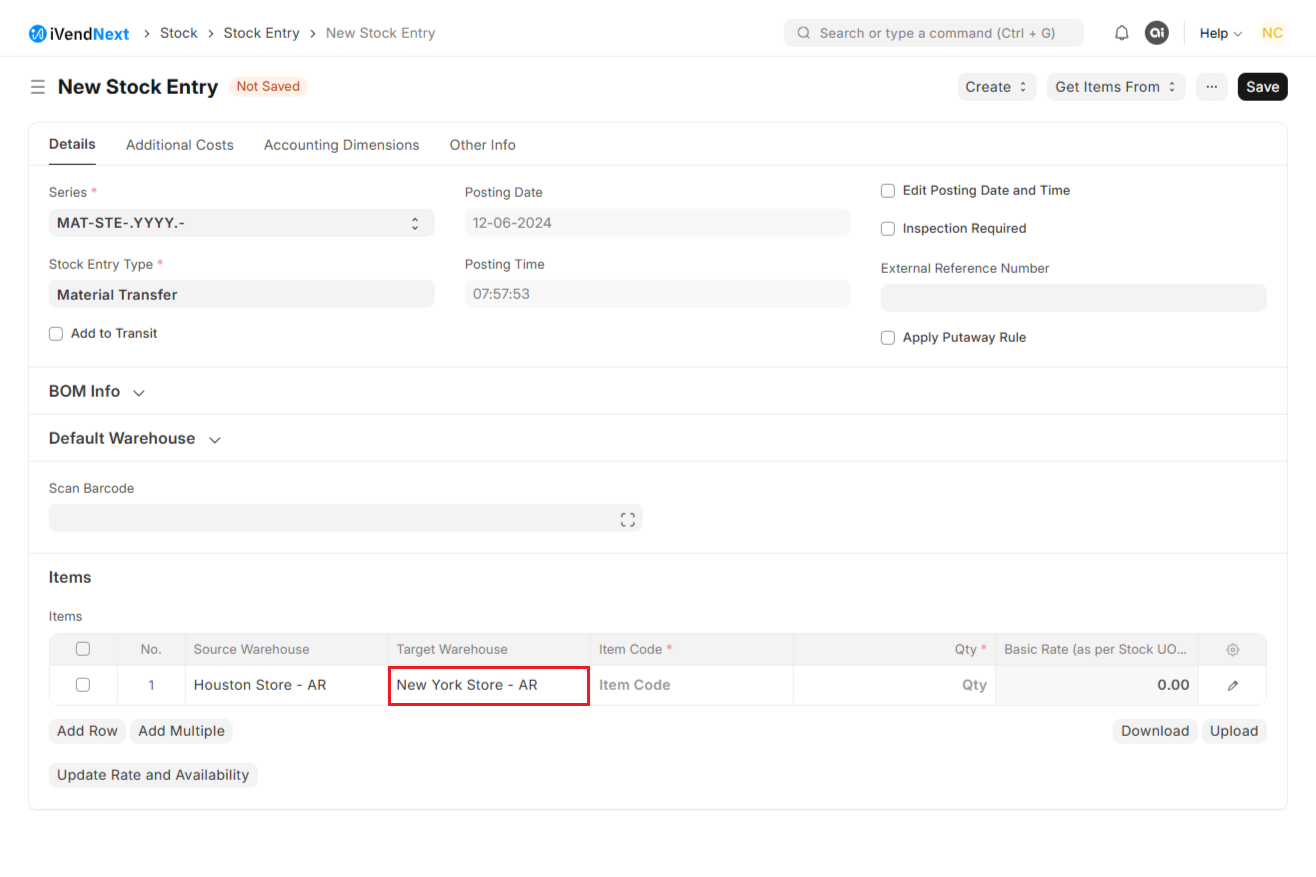
6. Set the Target Warehouse:
Specify the Target Warehouse (where the stock is going). The target warehouse is specified in the Items Table Template. In this illustration we are moving 5 units of Block Signature Tote from the Houston Store to the New York Store. So our target store will be the New York Store and we need to specify that in the Target Warehouse field.
7. Add Item Code:
Specify the item code of the items to be moved. In this illustration we are moving 5 units of Block Signature Tote from the Houston Store to the New York Store. So we have specified the Item Code - MS-1003 in the Item Code field.
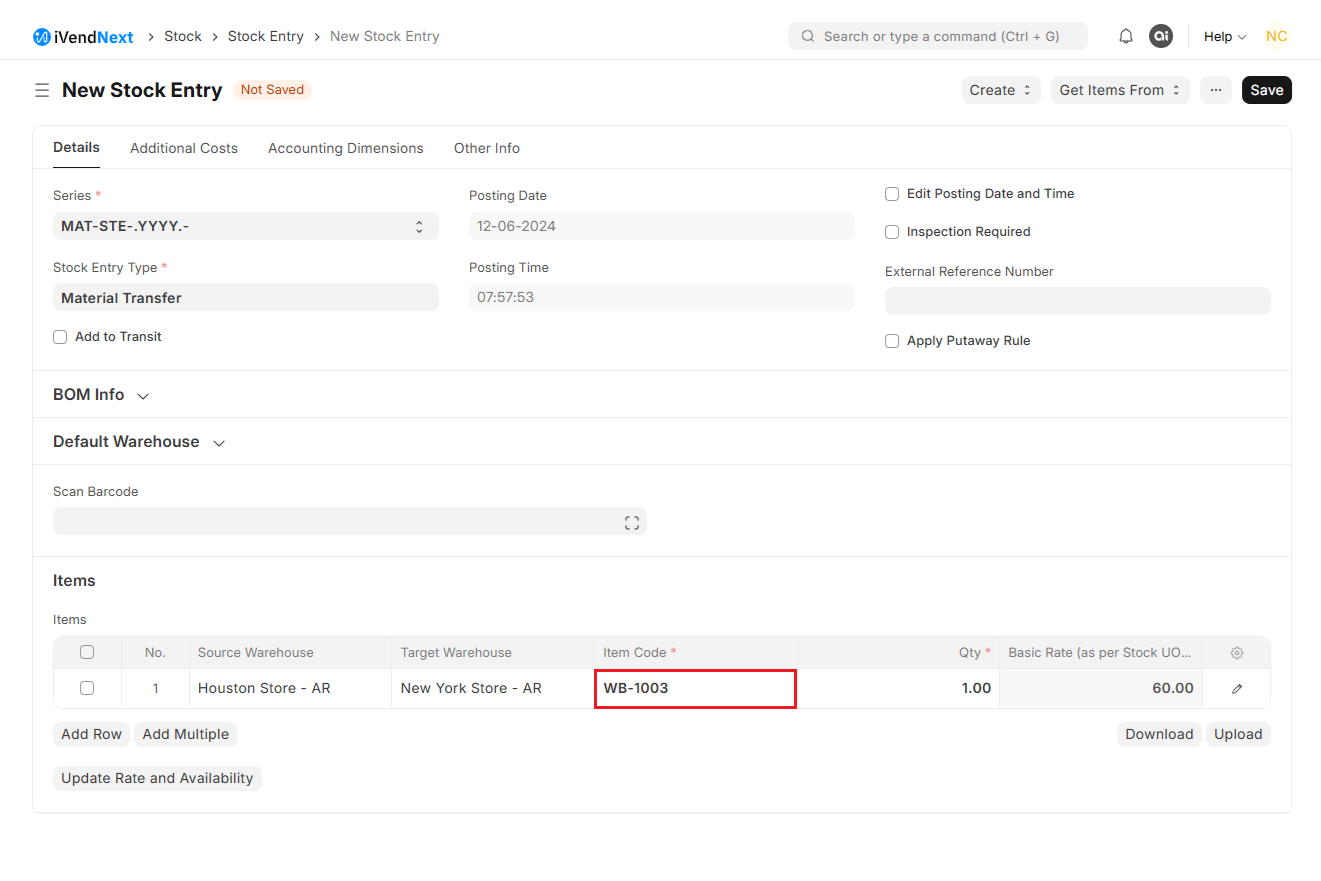
The moment you specify the Item Code the value in the below fields are auto populated:
Quantity Field
The value defaults to 1.
Basic Rate (As per Stock UOM)
The value is autopopulated based on the Basic Rate specified in the Item module.
8. Specify the Item Quantity:
Add the quantity to be moved. In this illustration we are moving 5 units of MS-1003 from the Houston Store to the New York Store. So we have specified the count as 5 in the Quantity field.
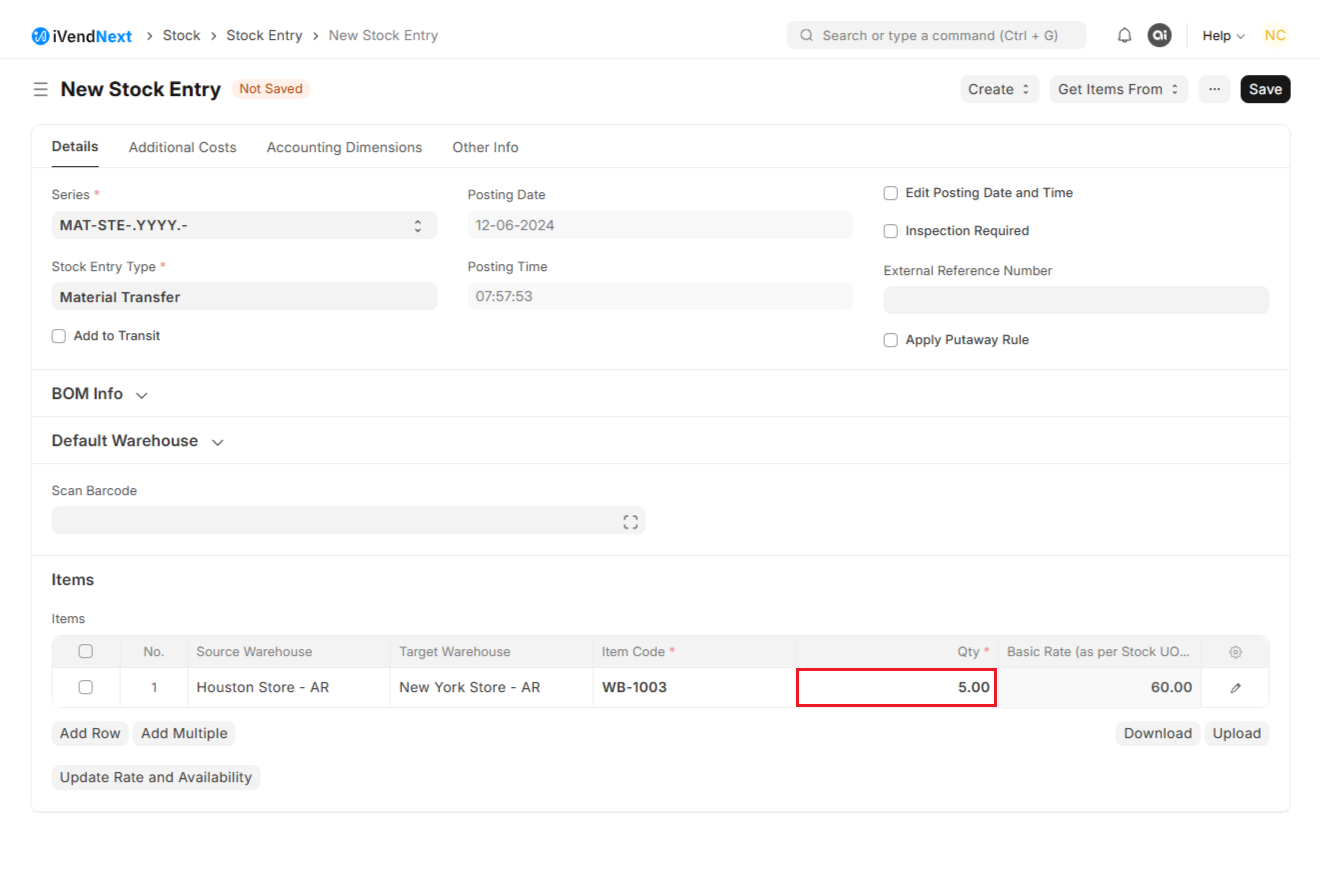
8. Save:
Save the Stock Transfer Entry. When you Save the Stock Transfer Entry, the status changes from Not Saved to Draft.
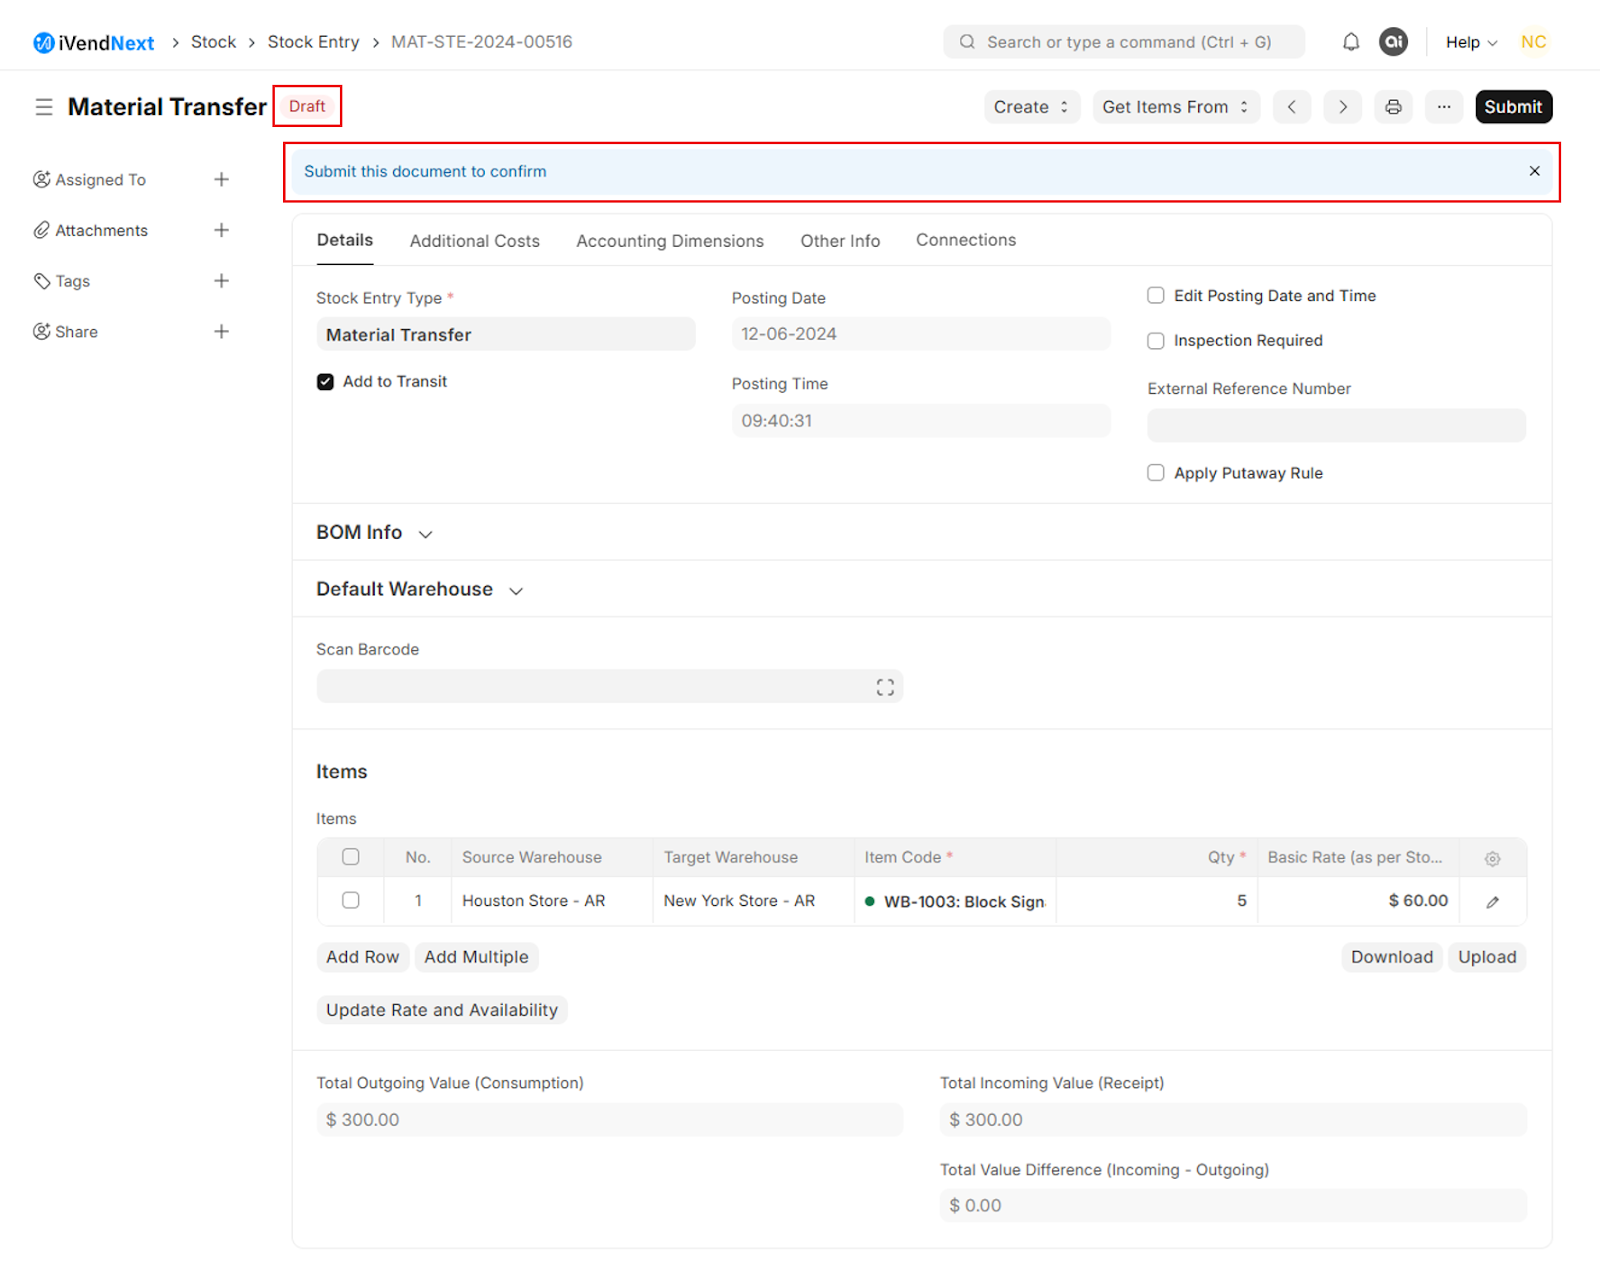
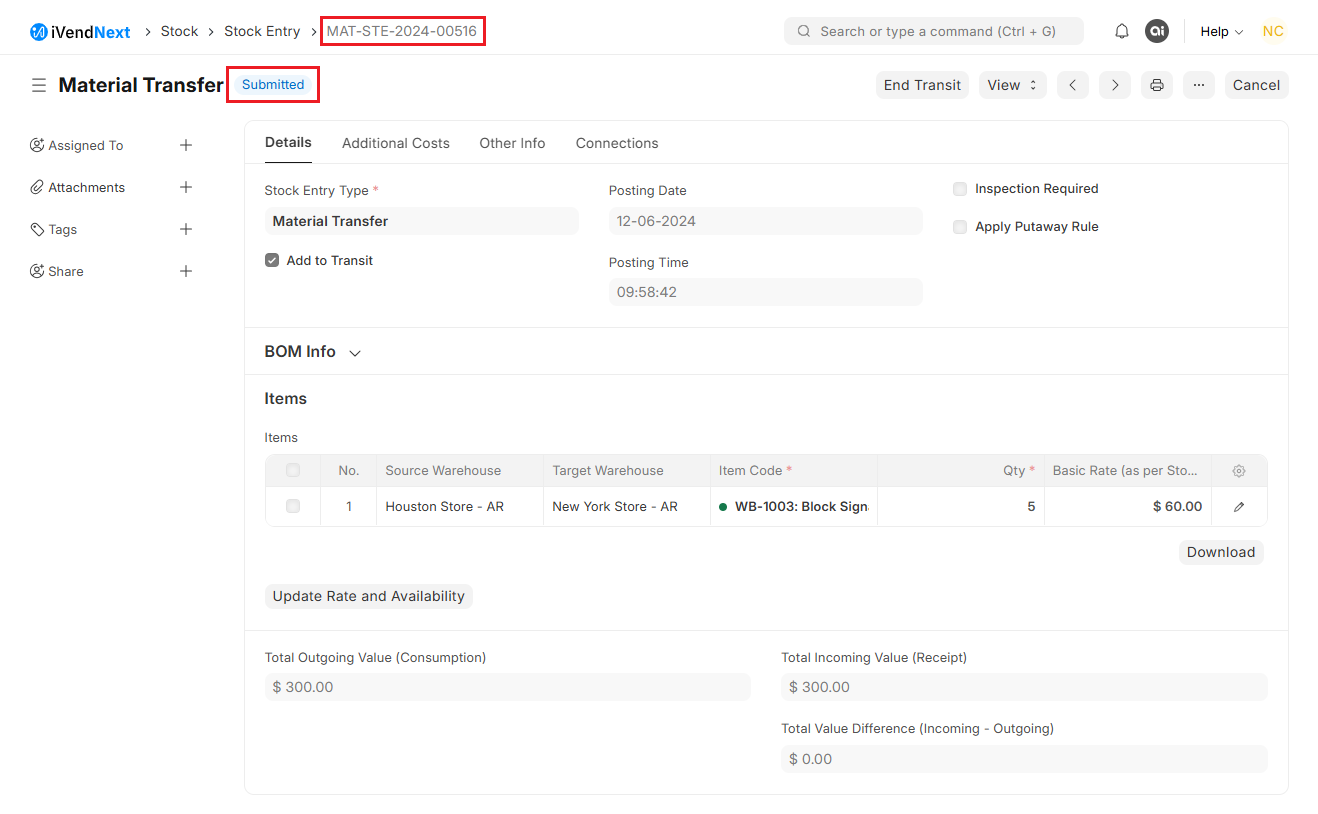
9. Review and Submit:
You need to then review the details. Once everything is correct, submit the Stock Transfer Entry to finalize the transaction. When you Submit the Stock Transfer Entry, the status changes from Draft to Submitted.
10. View Stock Ledger:
The stock levels in the respective warehouses will be updated automatically in the stock ledger.
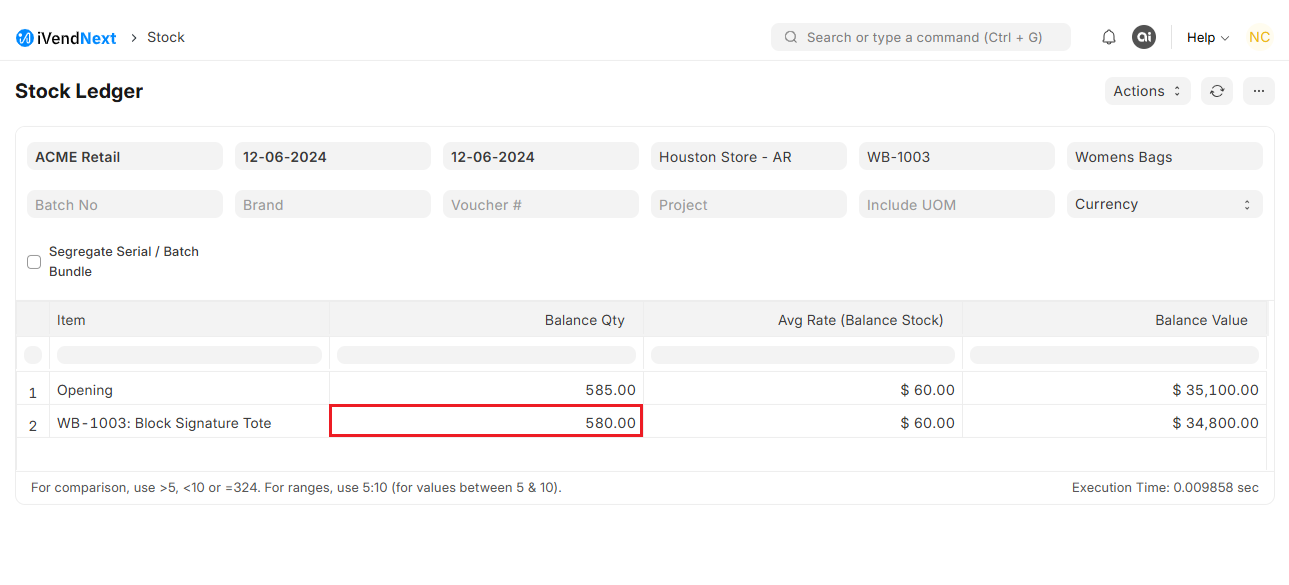
As per the Stock Ledger Report (Houston Store):
The stock balance of Item (WB-1003) on 12-06-2024 is 580 units.
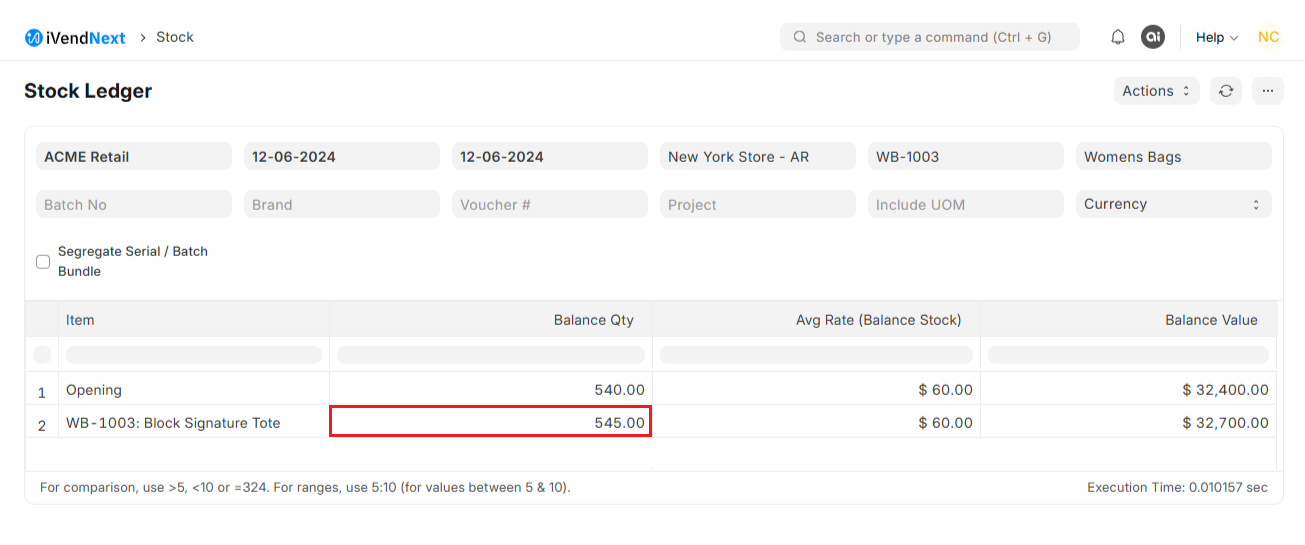
As per the Stock Ledger Report (New York Store):
The stock balance of Item (WB-1003) on 12-06-2024 is 545 units.
Additional Reports
We have already seen the screenshot from the Stock Balance Report in the previous section. Along with this report you can reference additional Stock related reports:
Stock Balance Report
Stock Summary Report
Stock Balance Report
Stock Balance at Houston Store After Transfer
The stock balance of Item (WB-1003) at the Houston Store can also be seen in the Stock Balance Report.
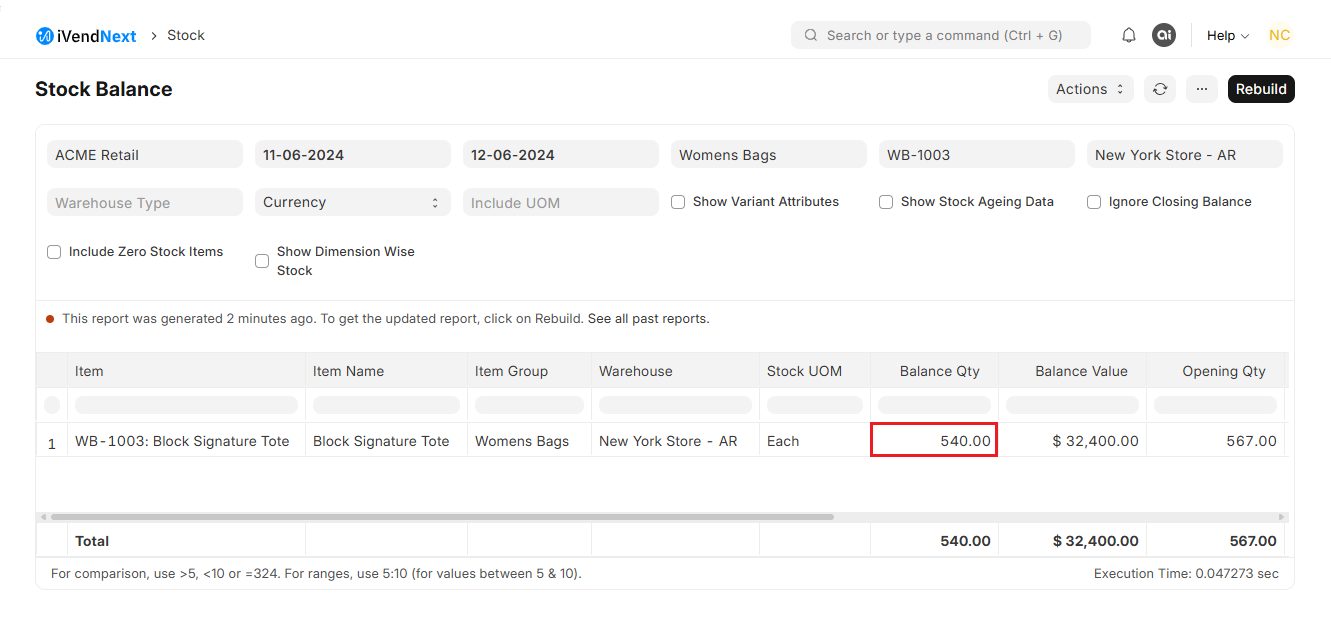
Stock Balance at New York Store After Transfer
The stock balance of Item (WB-1003) at the New York Store can also be seen in the Stock Balance Report.
Stock Summary Report
The stock balance of Item (WB-1003) at the New York Store and the Houston Store can been seen in the Stock Summary Report
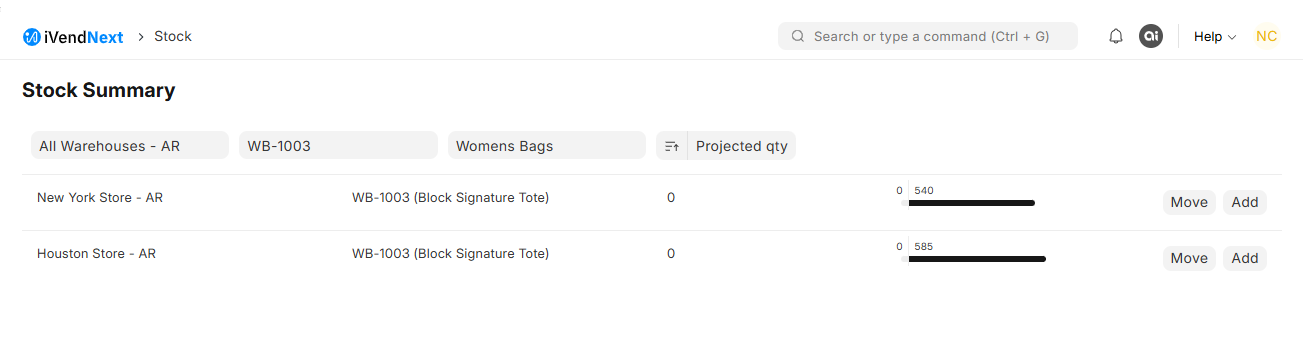
 Tip: You can create a Stock Entry directly from the Stock Summary Report. Identify the Warehouse you want to move the inventory from and then click on the Move button in the corresponding row.. This will open a Move Item popup screen.
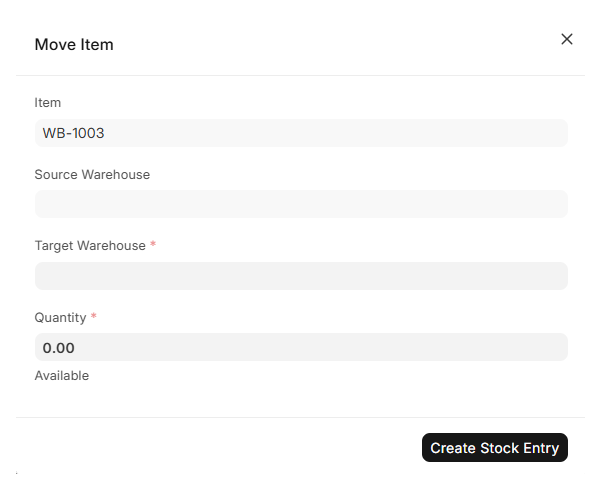
The Source Warehouse will be prepopulated. You just need to select the Target Warehouse. And specify the Quantity. Then click on the Create Stock Entry button.
Summary
A stock transfer process involves initiating a transfer request, preparing and shipping the items, receiving and checking the items at the destination, and updating inventory records. The Stock Entry feature is used to manage stock transfers, including specifying source and target warehouses, item codes, and quantities. The Stock Ledger, the Stock Balance, and the Stock Summary reports are used to track inventory movement and balances.
Related Articles
Key Concepts in Inventory Management
Key Concepts in Inventory Management This article provides detailed information on the key concepts and features related to the Stock or Inventory Module in iVendNext. Understanding these concepts and features will enable you to effectively manage ...Retail Transaction Posting
This article describes how iVendNext handles transaction posting with a focus on how a POS invoice is recorded. Introduction POS invoices are automatically generated upon transaction completion at the point of sale to streamline the checkout process. ...Correlation between reports
This article provides a comprehensive analysis of how POS sales, tender collections, and stock ledger reports interrelate to provide a holistic view of business performance. Introduction iVendNext is a comprehensive, web-based retail management ...Project Report
Introduction A project report is a comprehensive document that contains all the essential information about a specific project. It includes details such as the project's goals, objectives, progress, team performance, challenges faced, solutions ...Key Concepts in Retail
Key Concepts in Retail The provided sources outline various aspects of configuring and using the iVendNext Point of Sale (POS) system. Here's a detailed explanation of the key concepts and terms. Point of Sale (POS) A Point of Sale (POS) is the ...